
Registration for Apple Login
To complete the registration for a TechDoc instance, you will first need to create an App ID. It's most common for there to be one TechDoc App ID that is used by all of your TechDoc instances where each TechDoc instance will have its own Service ID however, you are free to create individual App IDs for each instance if needed.
Create an App ID
- Open a web browser and log into your account on Apple developer account.
https://developer.apple.com
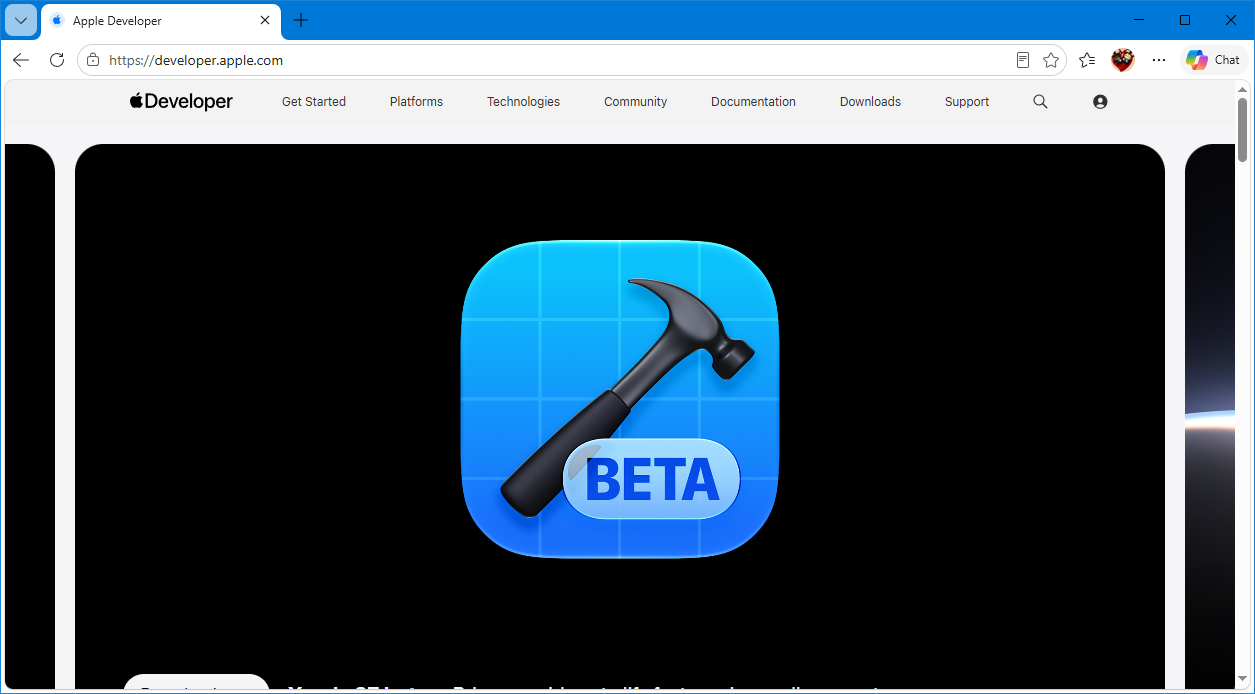
- Click in the upper right hand corner on the user menu, and select the "Certificates, IDs & Profiles" link.
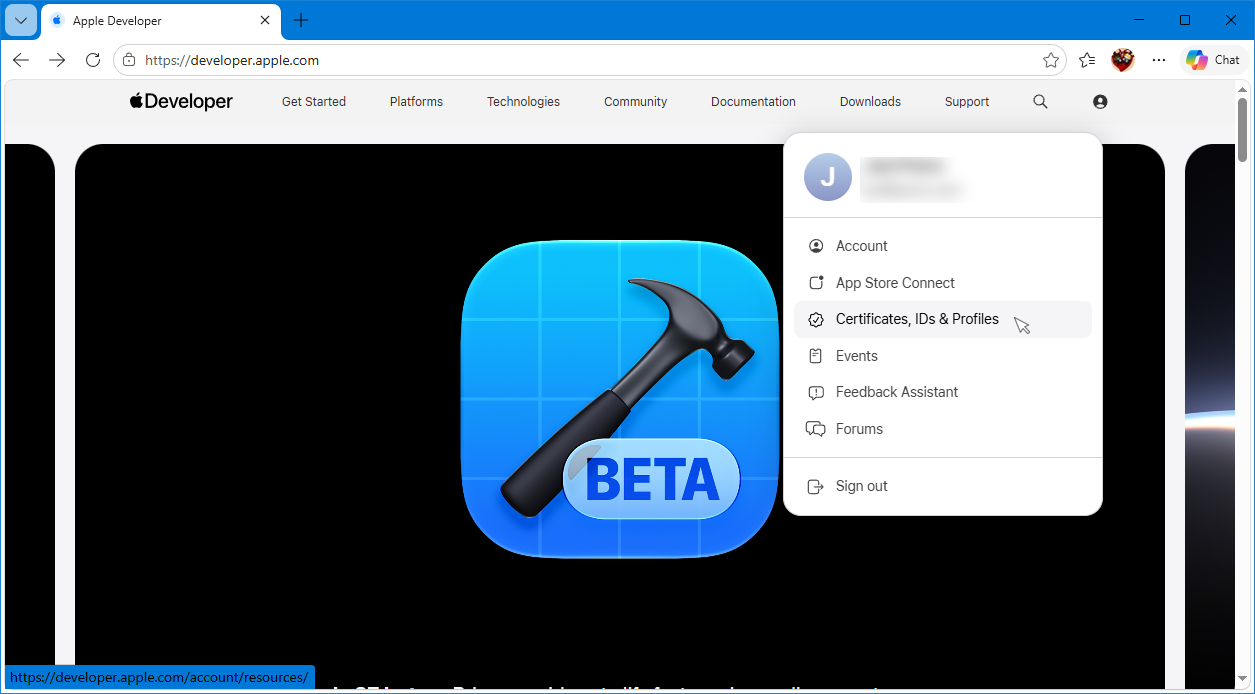
- On the Certificates, Identifiers & Profiles screen, click the "Identifiers" link on the side menu.
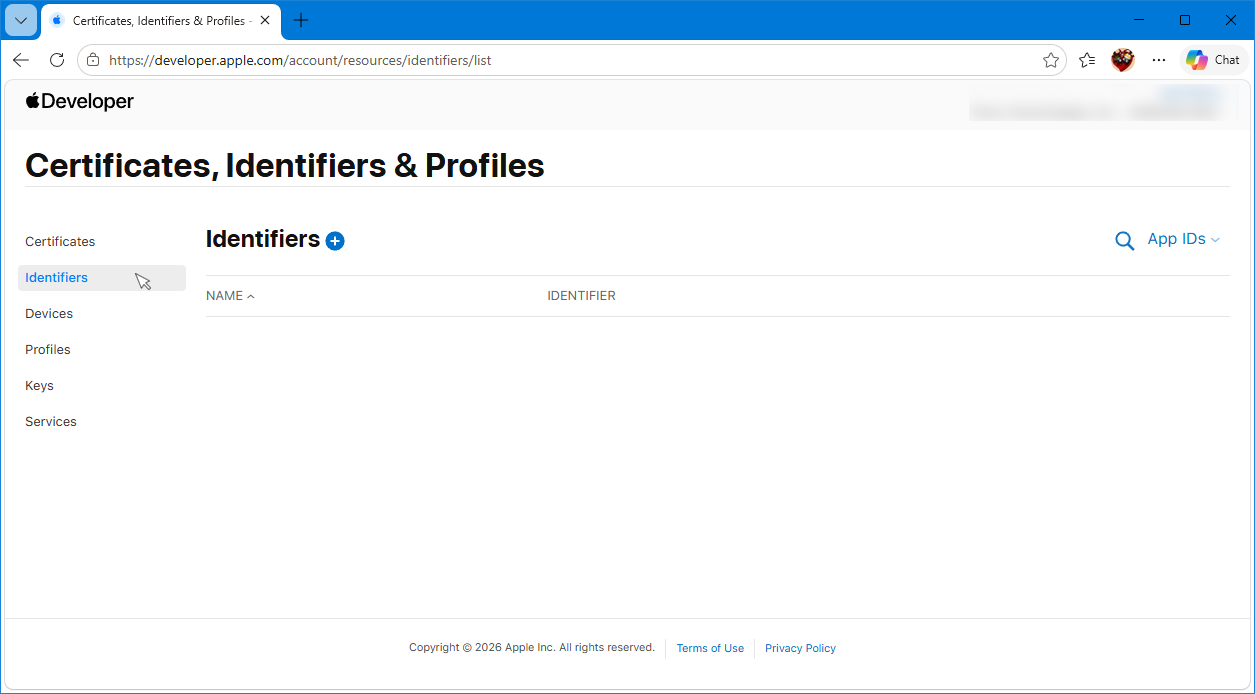
- On the Identifiers tab, click the plus sign to add a new App ID.
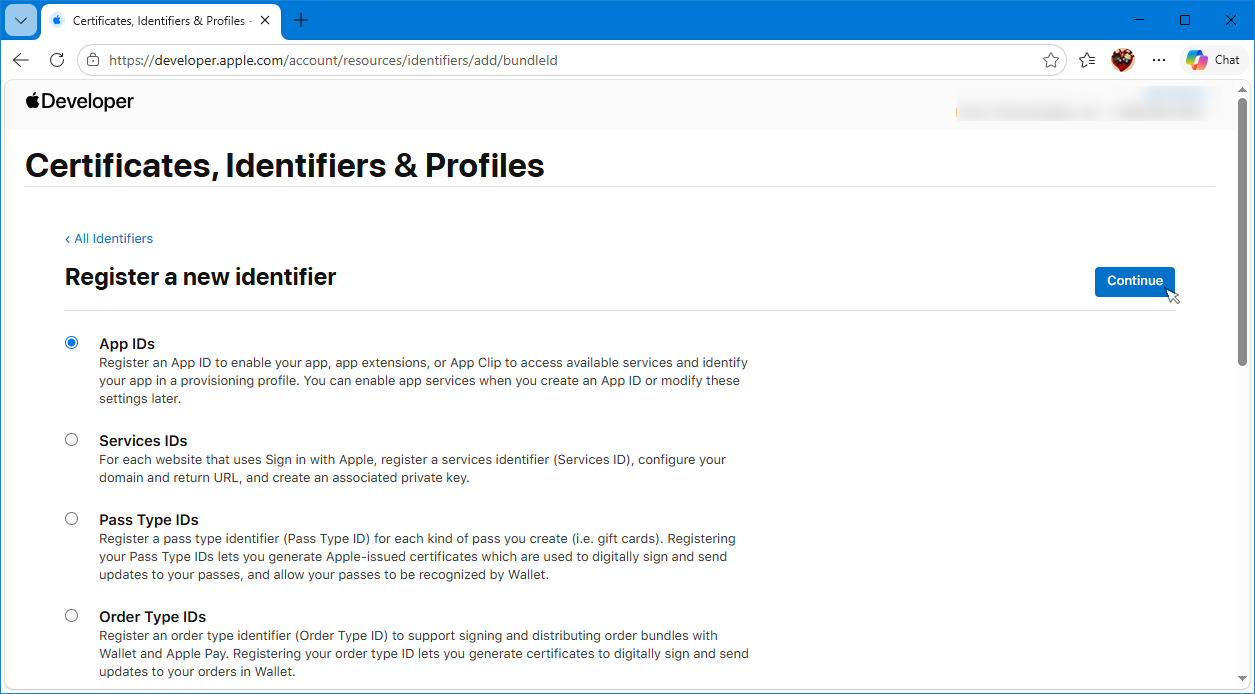
- On the Register a new identifier screen, select App IDs and then click the continue button.
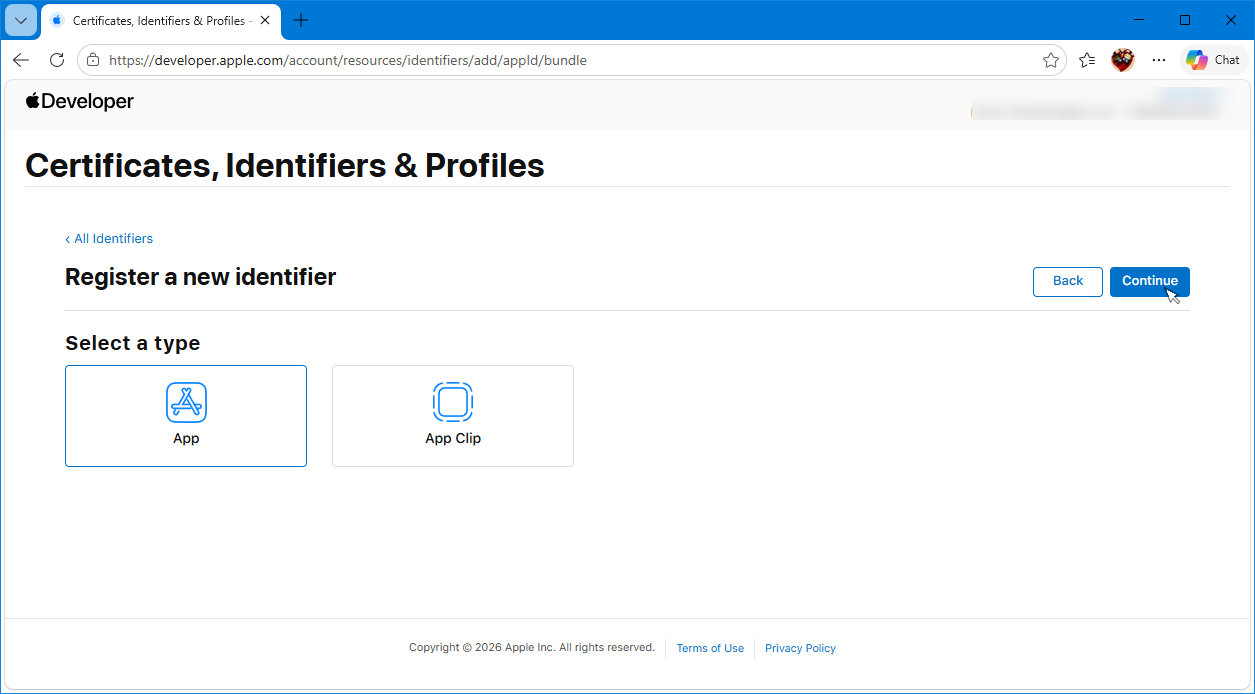
- On the next screen, select App and then click the continue button.
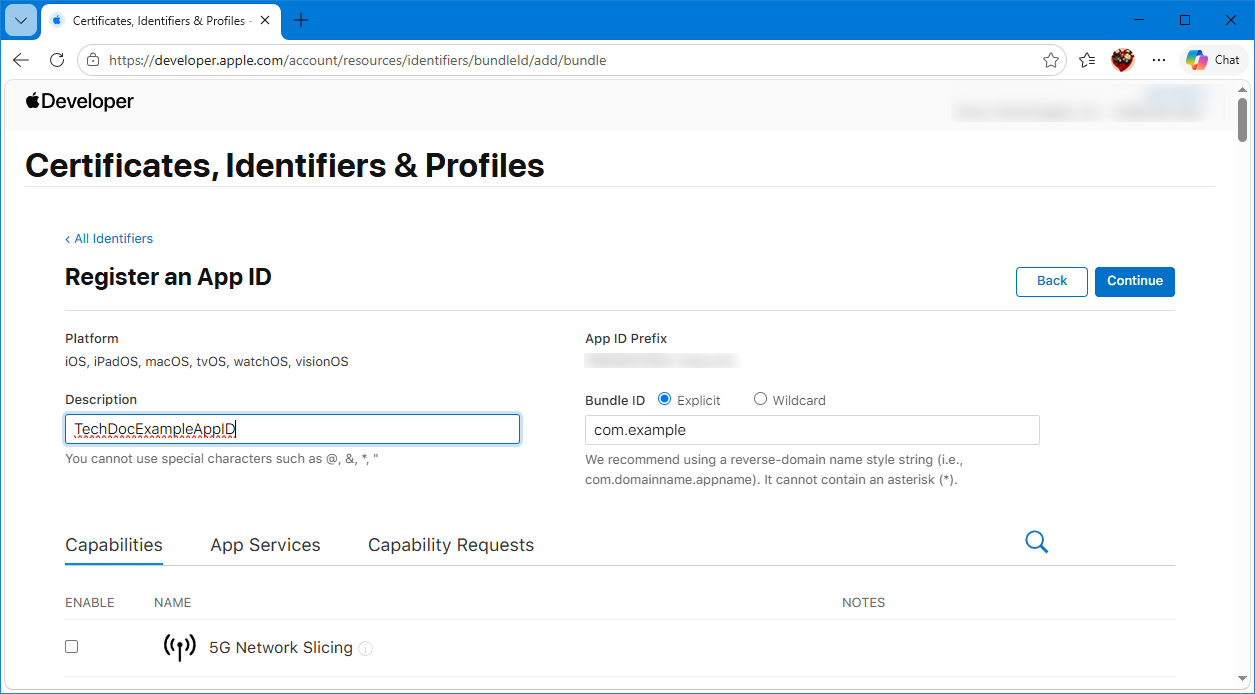
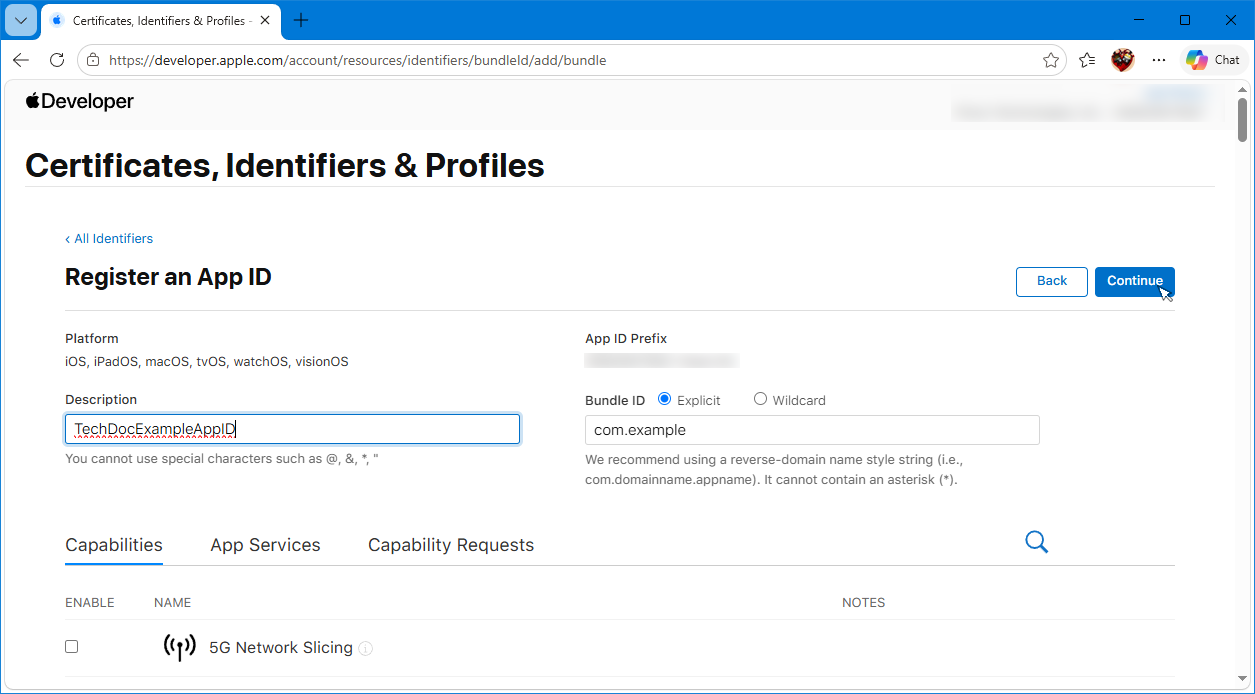
- On the following screen, enter a description for your new App ID and enter a Bundle ID prefix. The Bundle ID prefix must be in reverse-domain style formatting. We used com.example for this example, but you should specify the appropriate reverse-domain style string for your domain.
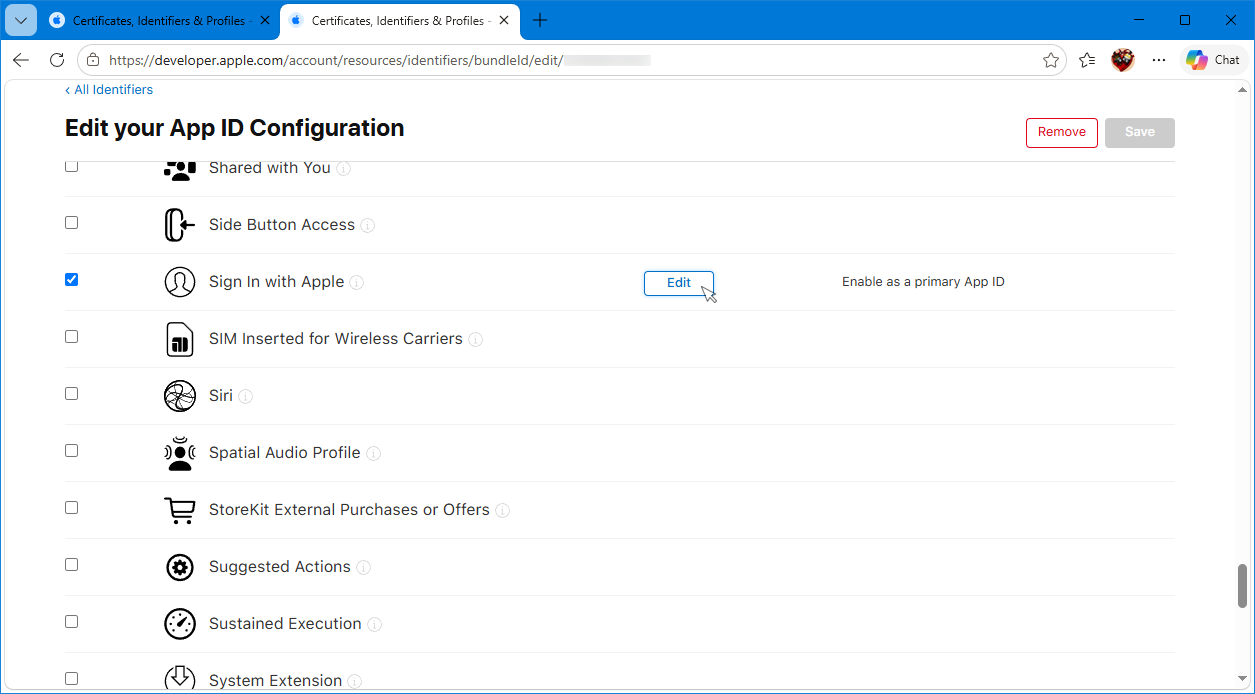
- Scroll down the page and check the box next to "Sign In with Apple" in the capabilities list.
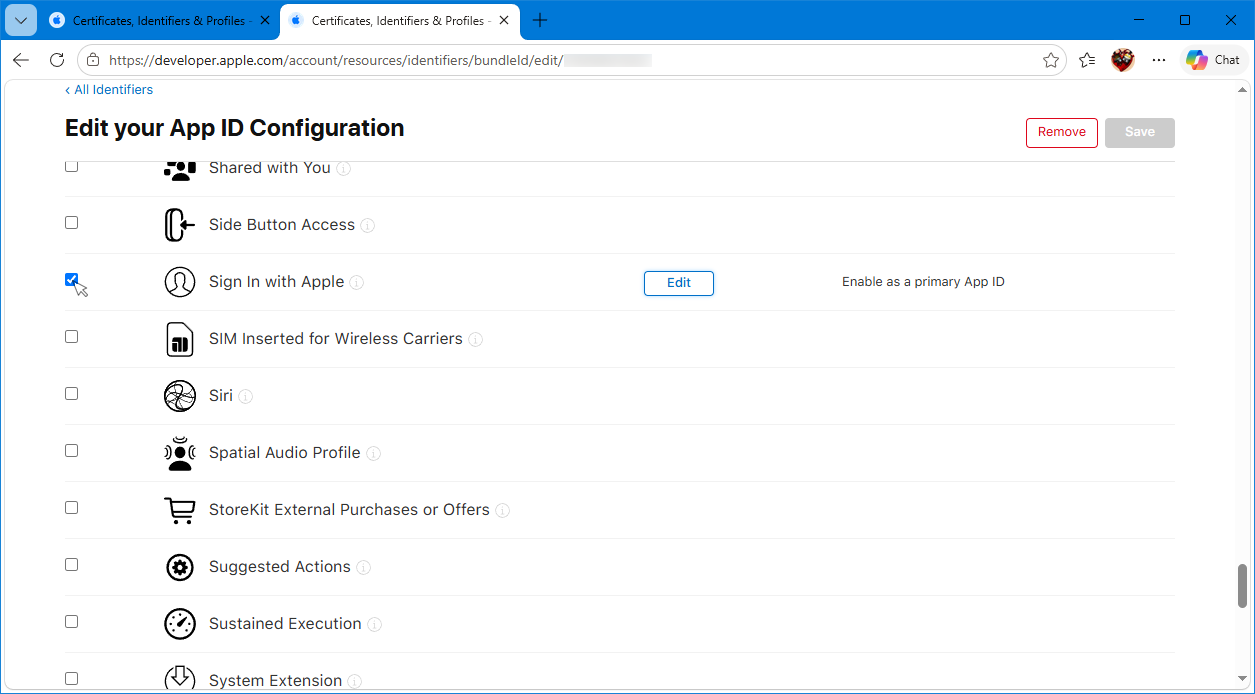
- Click the Edit button to the right of the "Sign In with Apple" checkbox.
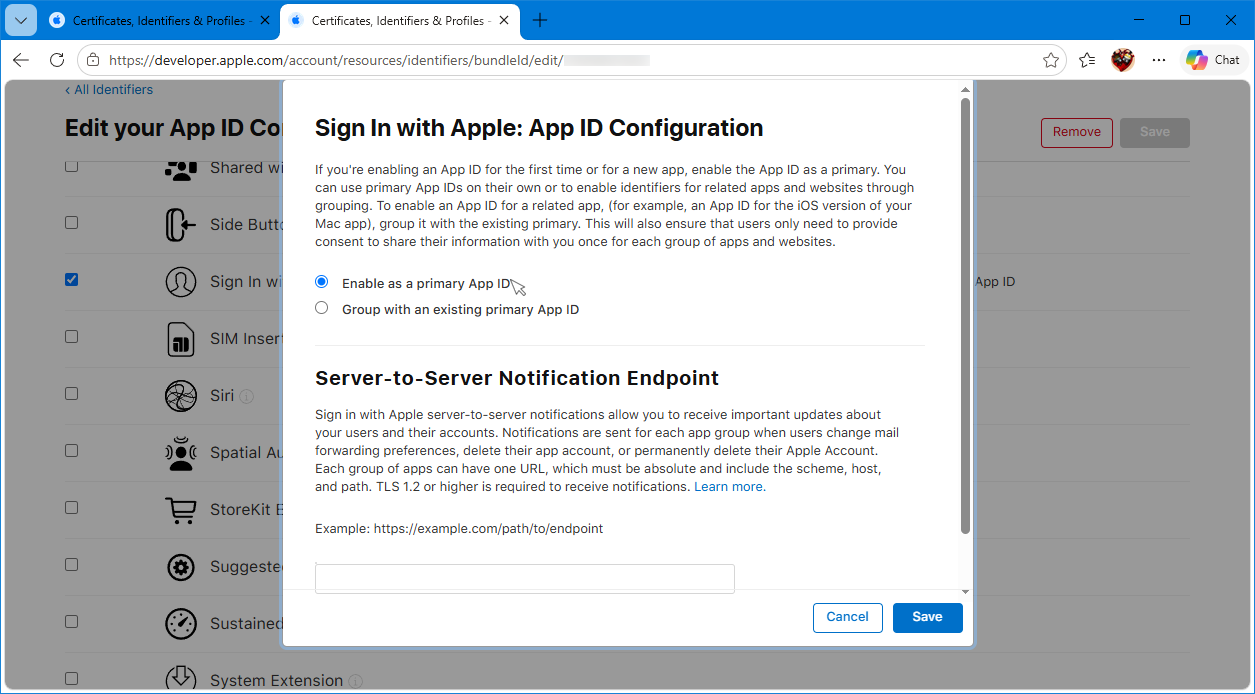
- Make sure "Enable as a primary App ID" is selected, and then click the Save button.
- Scroll back to the top, and then click the Continue button.
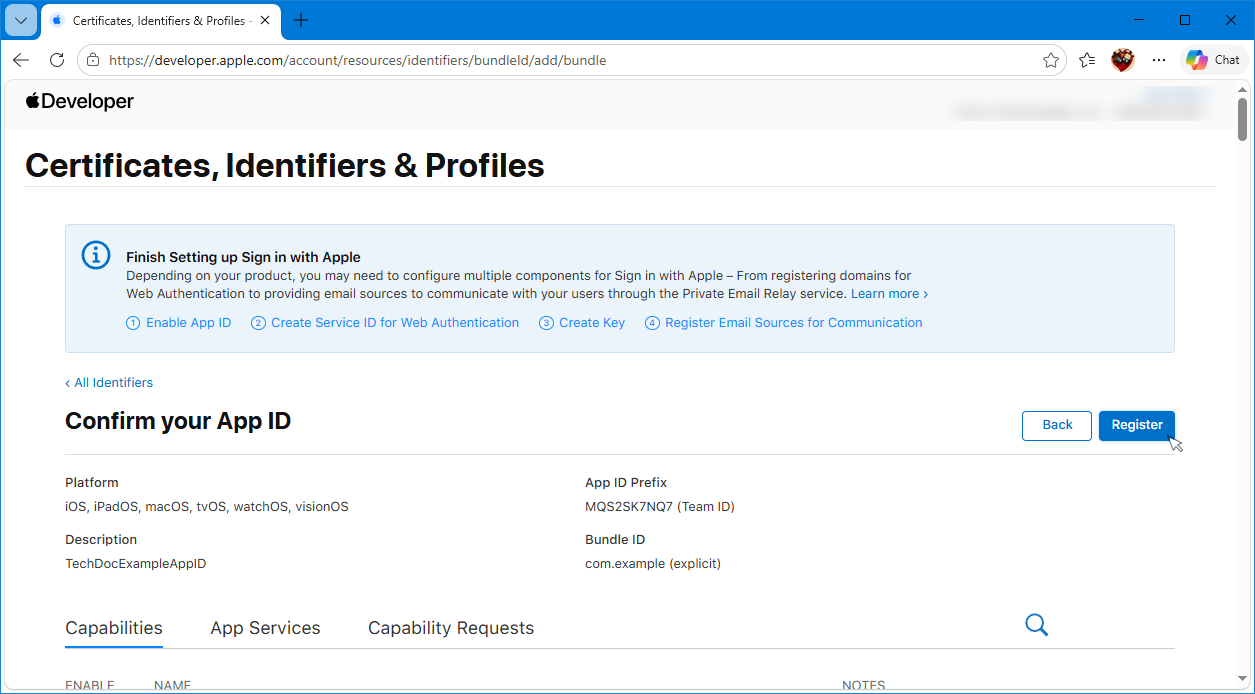
- Finally, review the recommended follow on steps, and then click the Register button to complete the App ID.
Create a Service ID
Now that you have a primary App ID created for your TechDoc service instances, you can move on to create a Service ID for each of your TechDoc instances. Follow the next set of steps to do this.
- Click the Identifiers link from the menu on the left side, click the App IDs menu on the right side, and then click the Services IDs link.
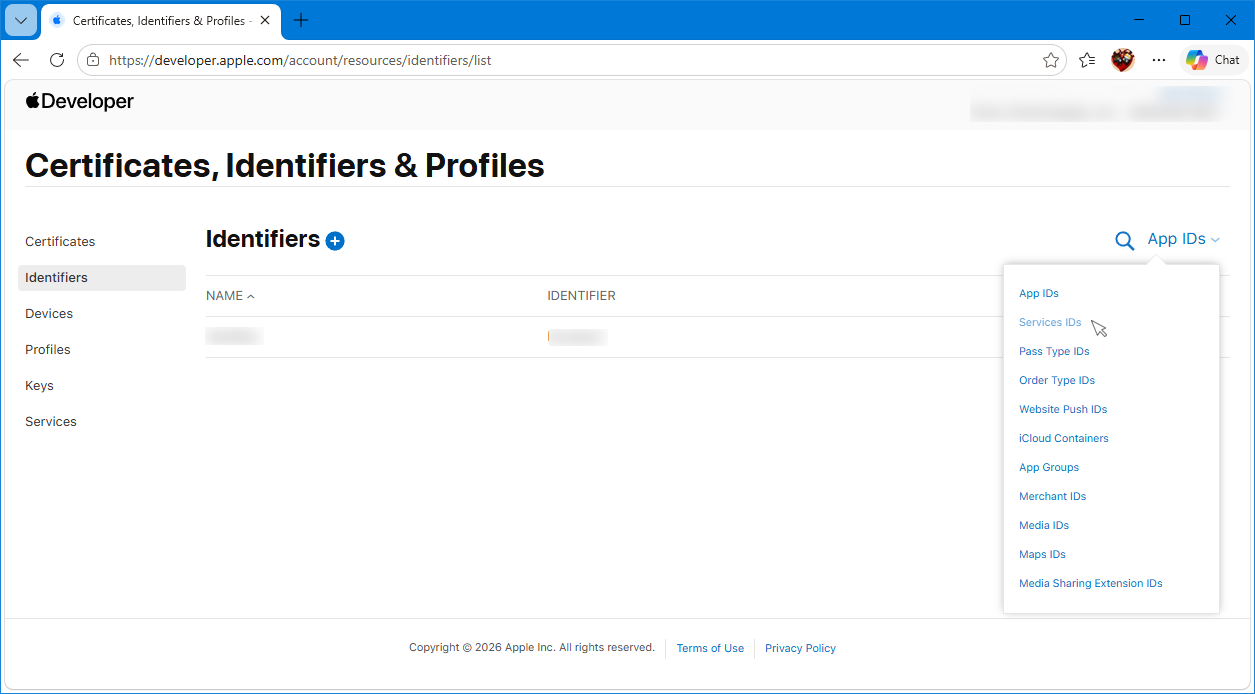
- On the Service Identifiers screen, click the plus sign to add a new Service ID.
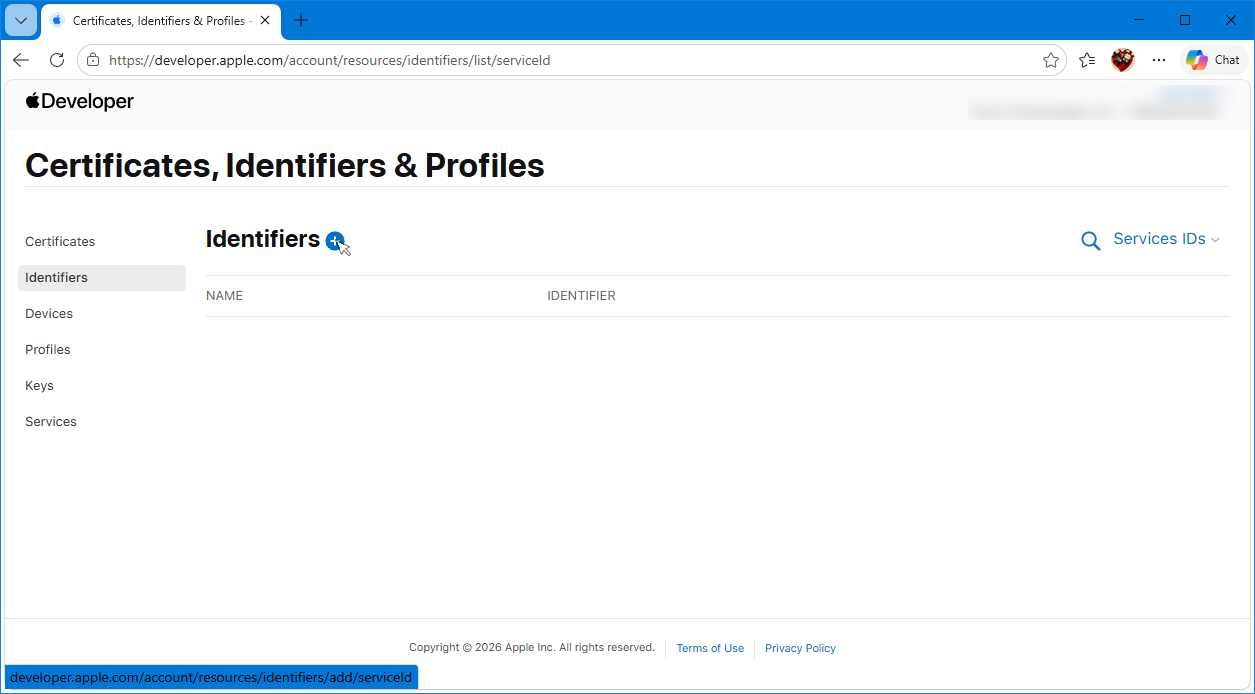
- On the Register a new identifier screen, select Service IDs, and then click the Continue button.
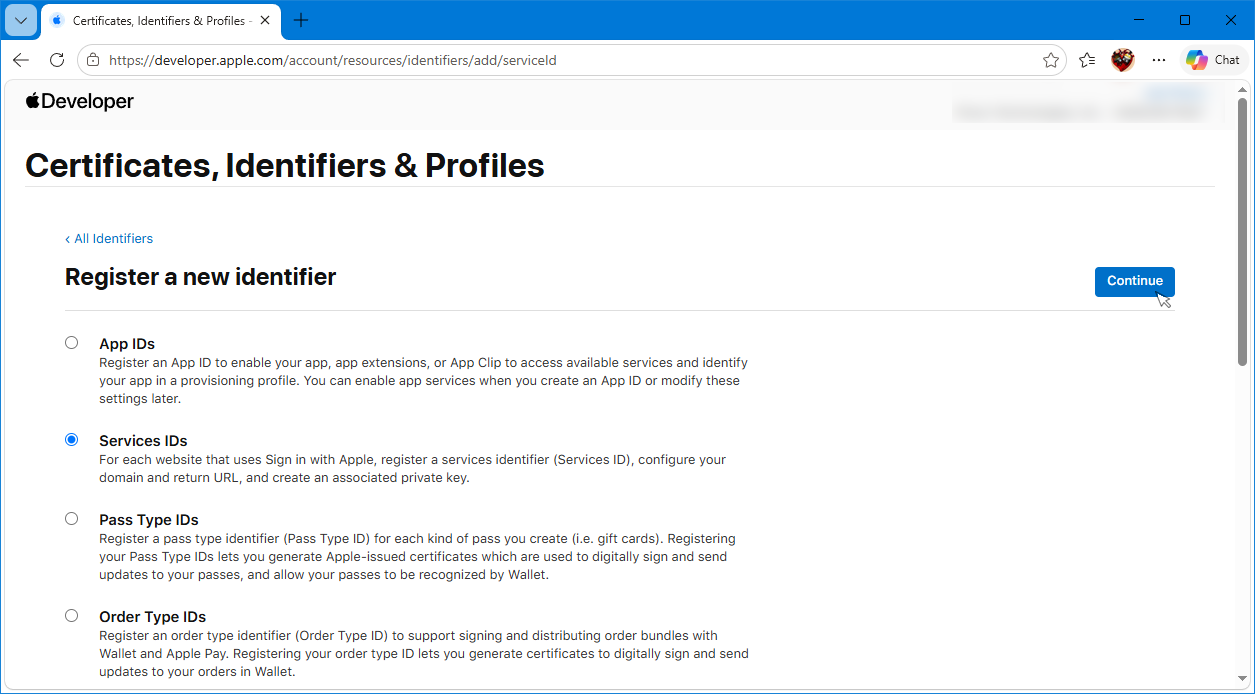
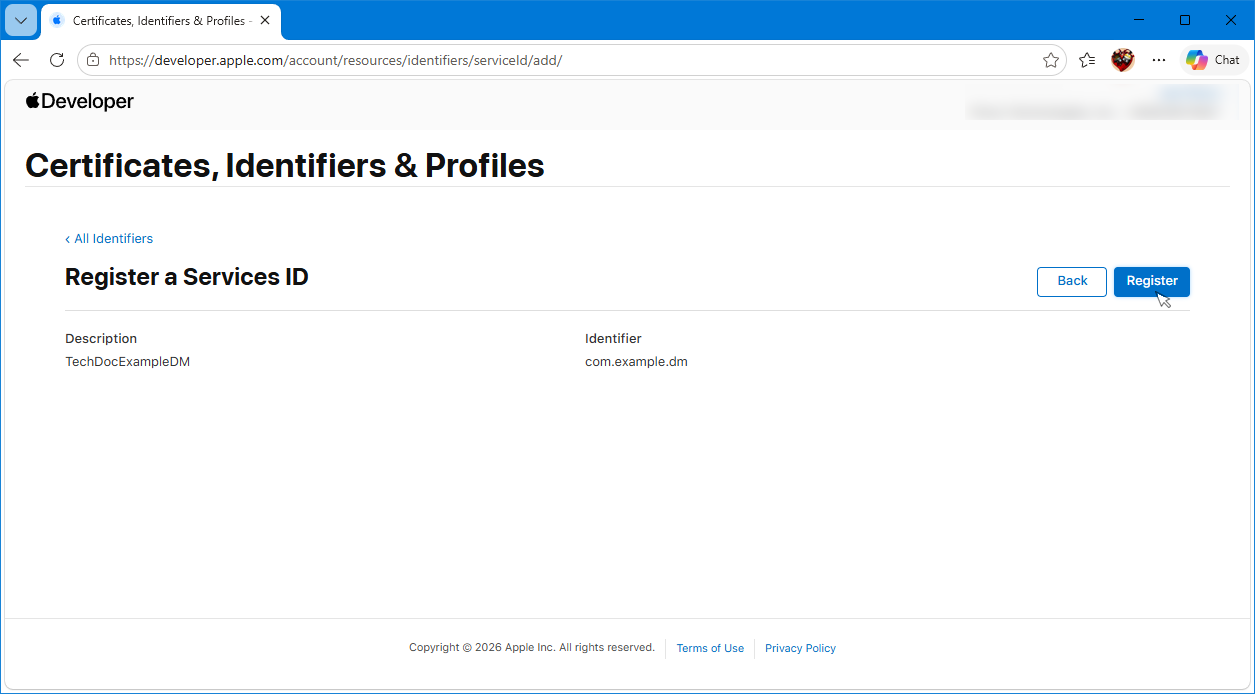
- On the following screen, enter a description and identifier for your new Service ID. This should follow the reverse-domain style string used for your App ID. As we entered com.example for our App ID, we would enter the name of the subdomain used by our TechDoc instance. Since we are setting up a DM, we'll just use com.example.dm. Before moving on, go ahead and create a text file. In this text file, write down the identifier your entered for your Service ID identifier, it will be needed later when configuring TechDoc. After you have saved this information to the text file, click the Continue button.
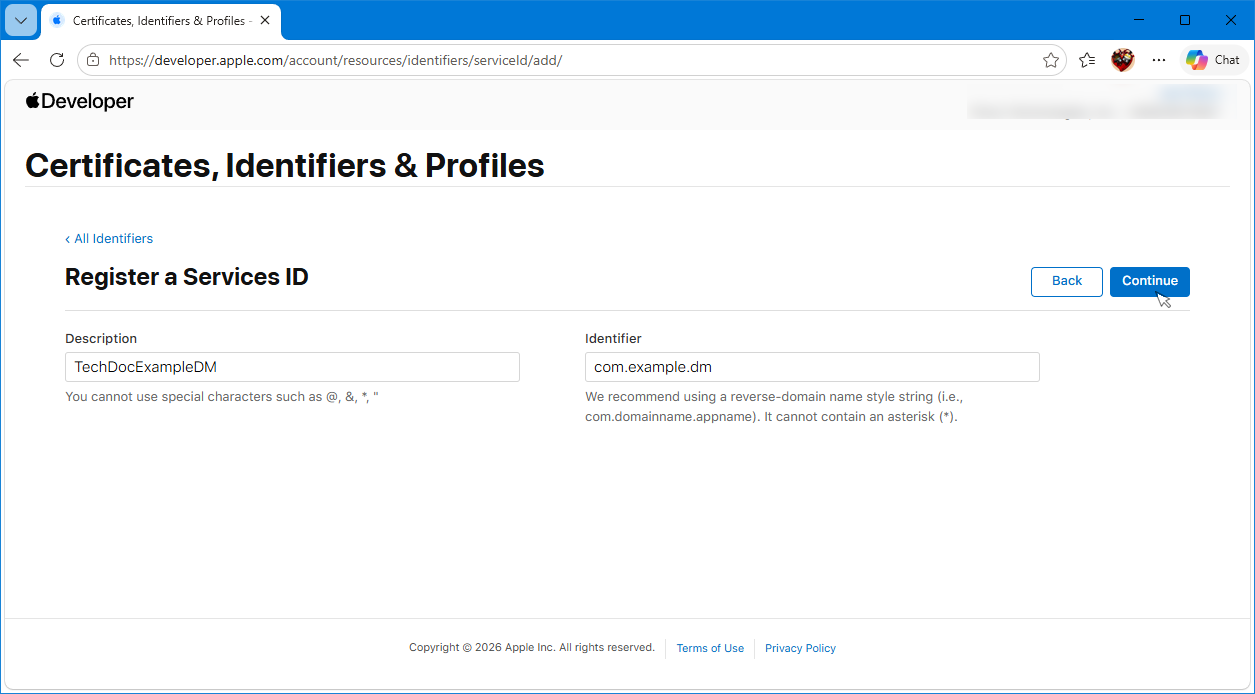
- On the last screen, click the Register button.
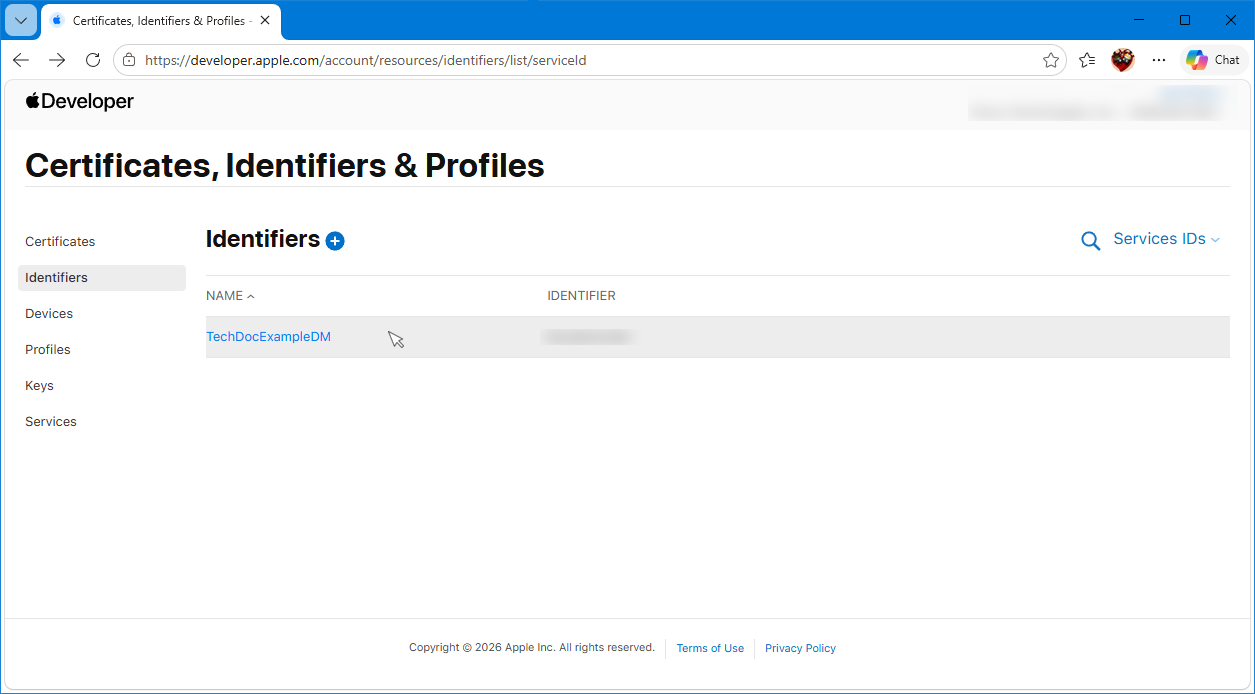
- You've now created the Service ID. On the Service Identifiers screen, click your newly created Service ID.
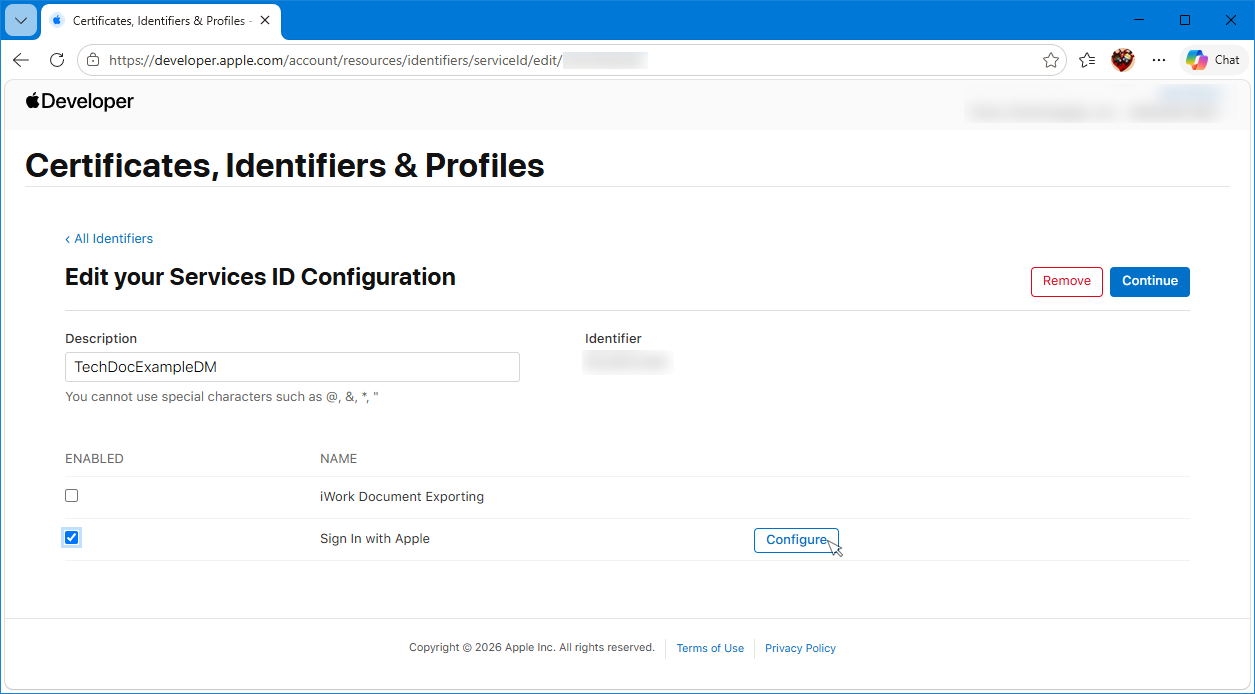
- On the Editor your Services ID Configuration screen, make sure the box next to "Sign In with Apple" is checked, and then click the Configure button.
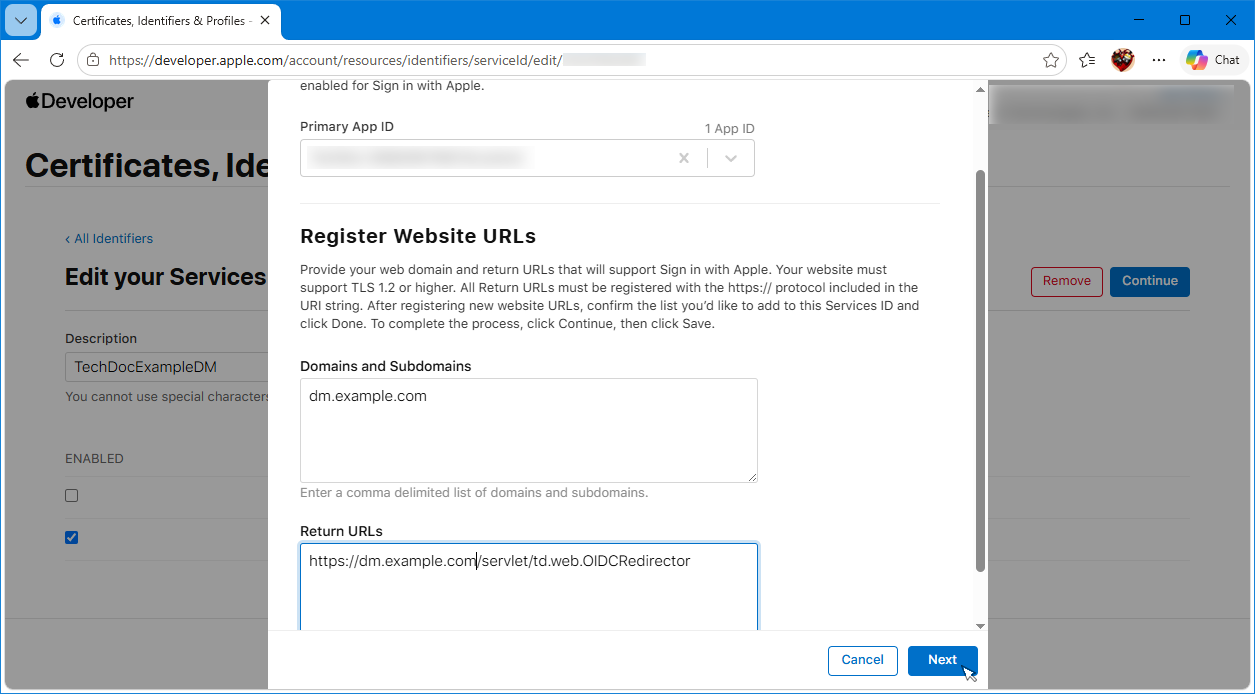
- On the Web Authentication Configuration screen, select your App ID, enter the domain of your TechDoc DM or SM as shown, and then enter the Return URL (the Redirect URL) for your DM. It should take the form of:
https://YOUR_TECHDOC_INSTANCE_HERE/servlet/td.web.OIDCRedirector
replacing YOUR_TECHDOC_INSTANCE_HERE with the fully qualified host name of your TechDoc DM or SM. After you have done all of this, click the Done button, then the Continue button, and then the Save button.
Create a Key
Now that you have a primary App ID created for your TechDoc service instances, and a Service ID created for the TechDoc DM or SM you are setting up, you need to create a keypair for authentication. Follow the next set of steps to do this.
- Click the Keys link from the menu on the left side, and then click the plus sign to create a new key.
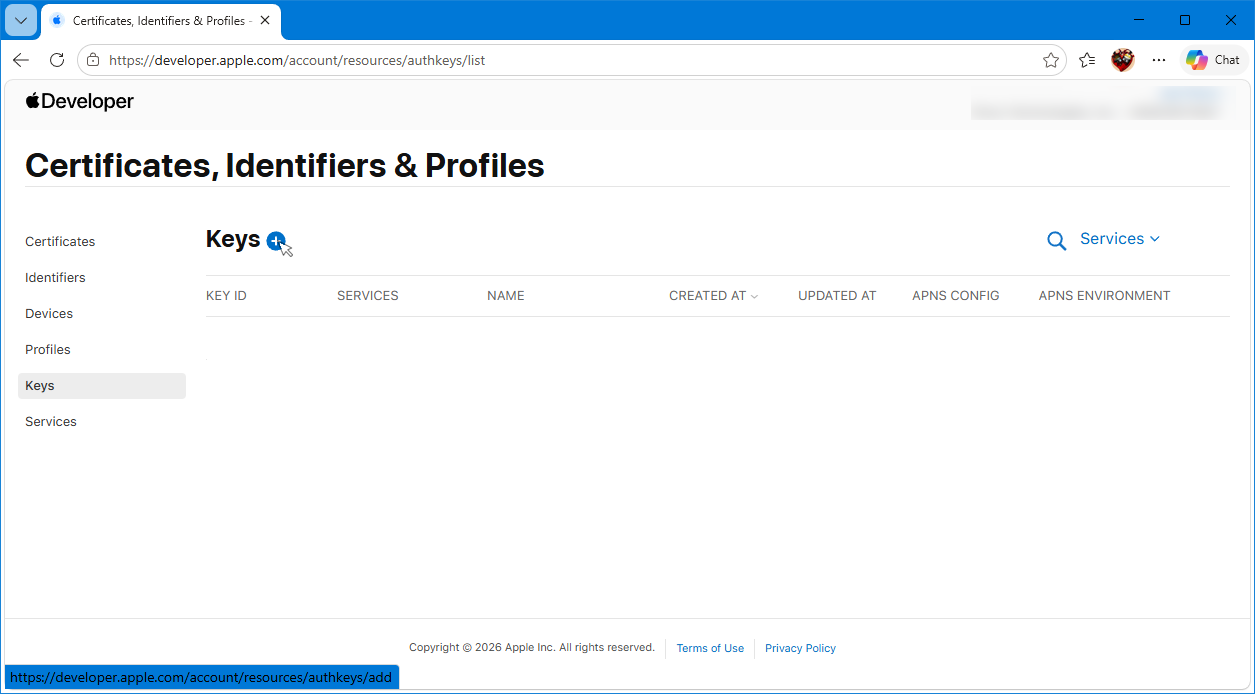
- Enter a name for your authentication key, and then scroll down the list of uses.
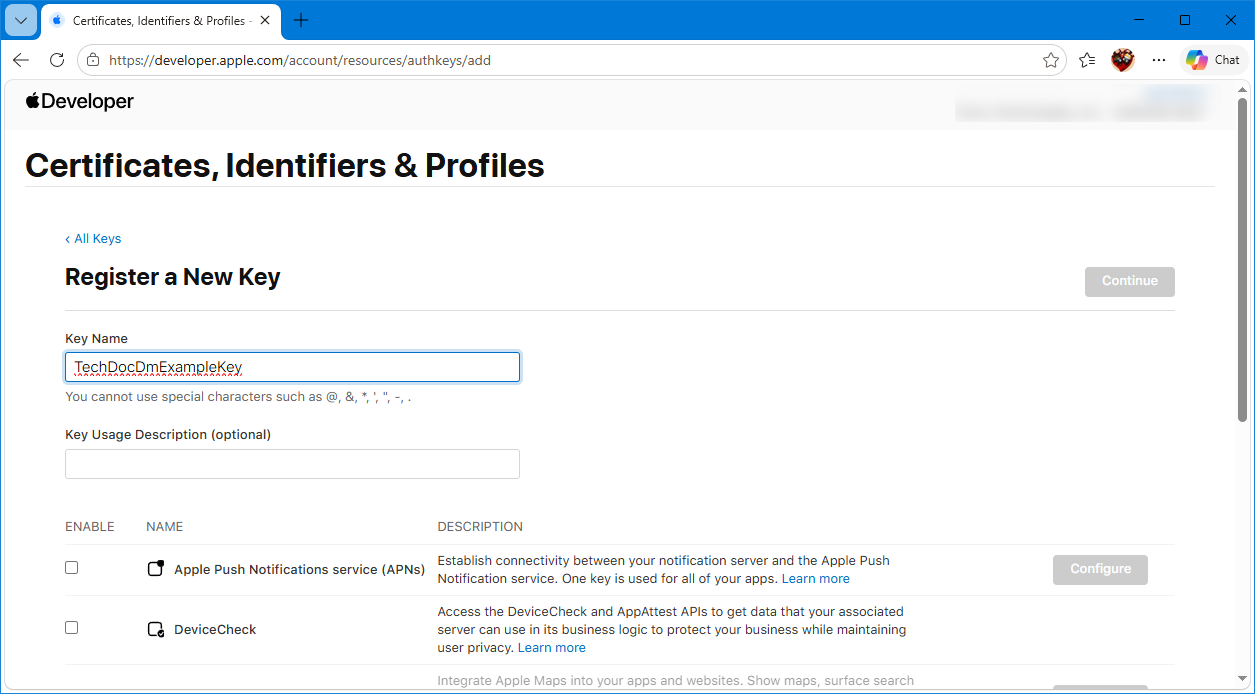
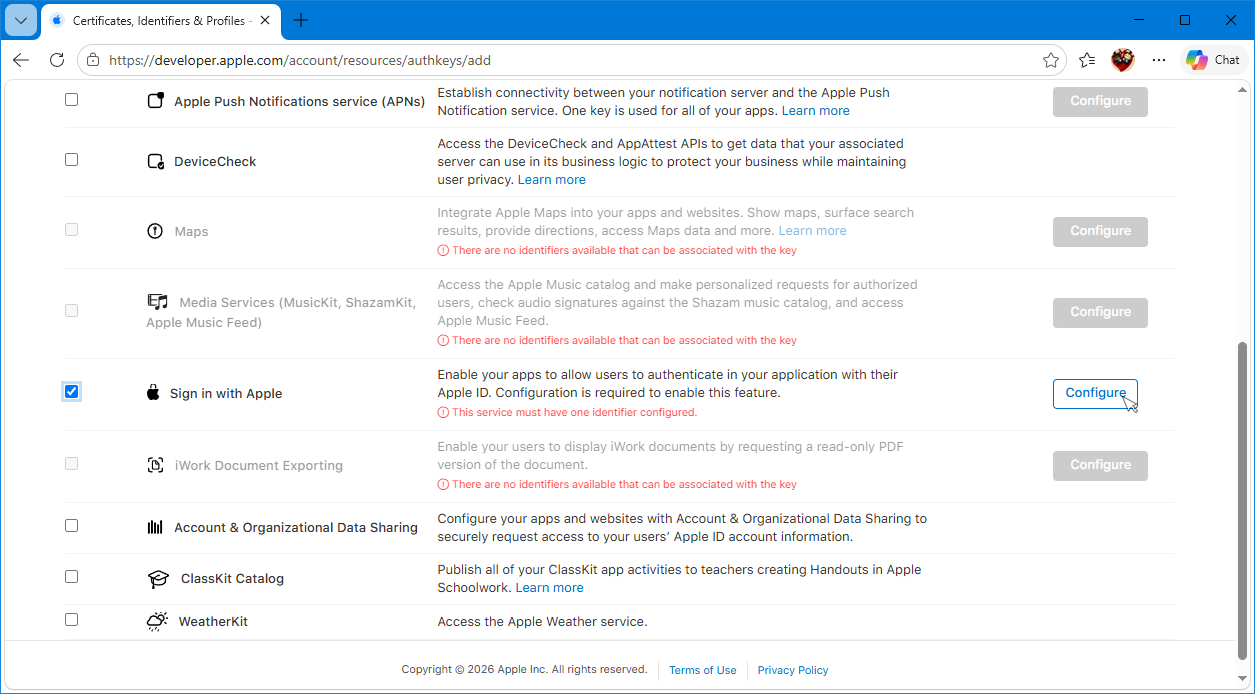
- Check the box next to "Sign in with Apple", and then click the Configure button.
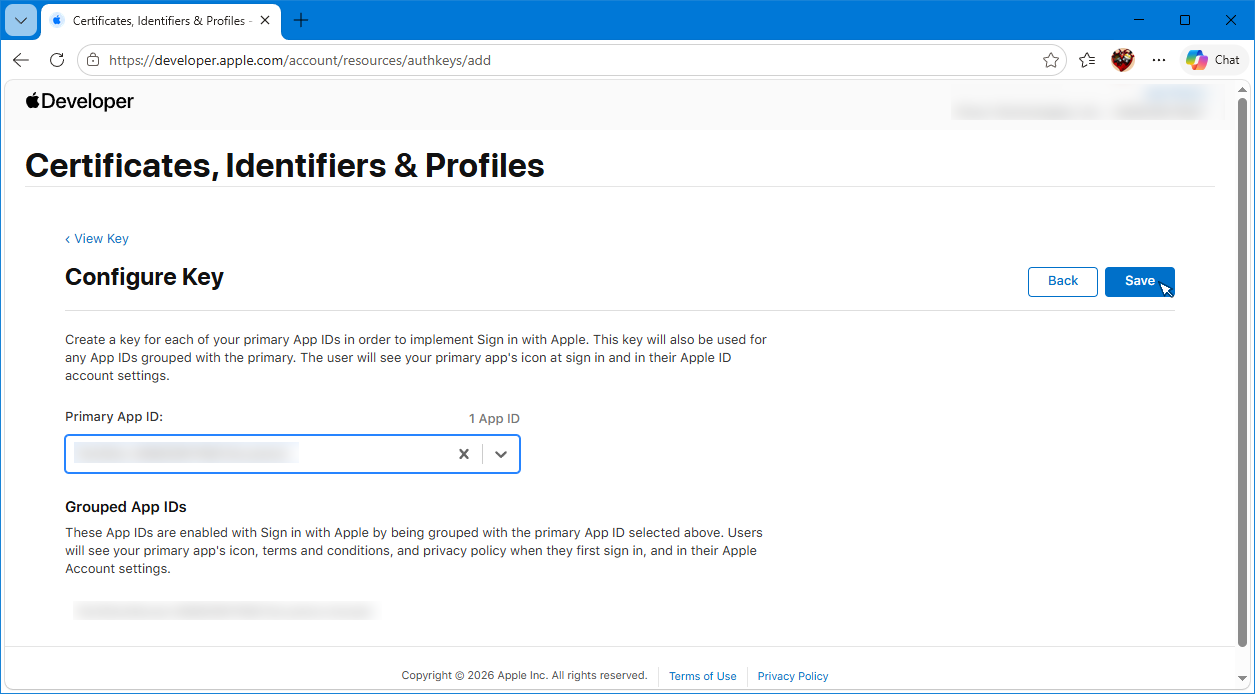
- On the Configure Key screen, select the Primary App ID you created earlier and then see that your Service ID is listed below, and then click the Save button.
- Click the Continue button.
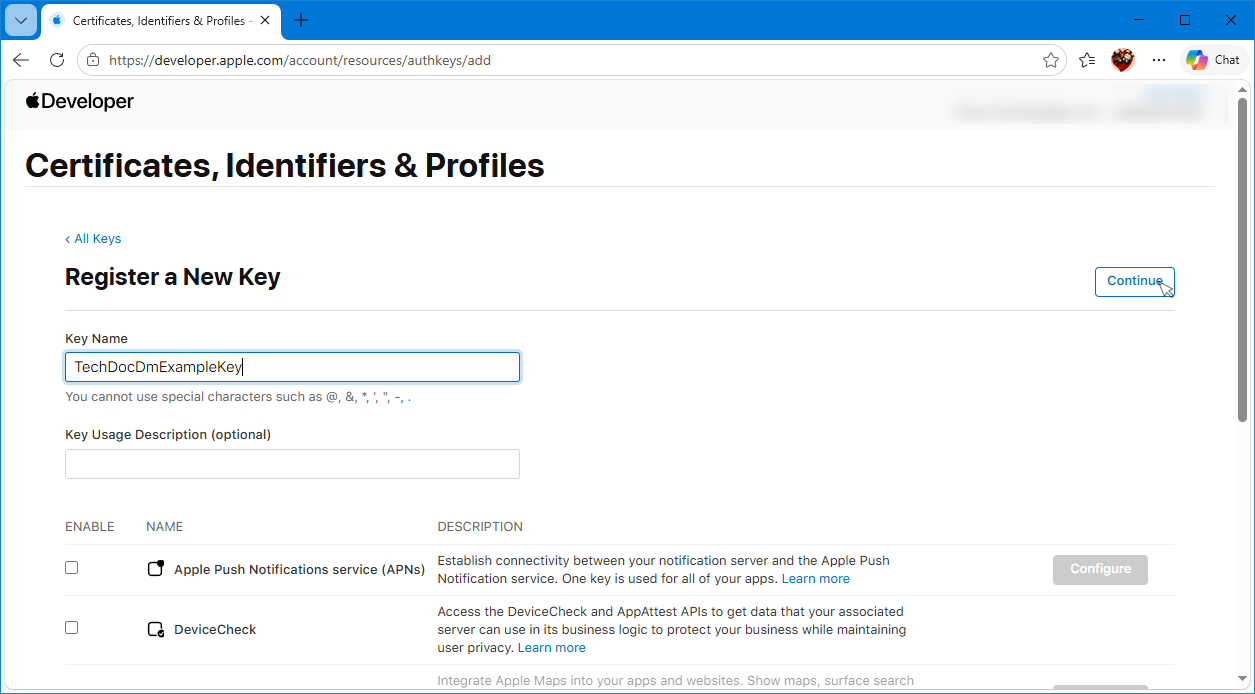
- Click the Register button to complete the key creation.
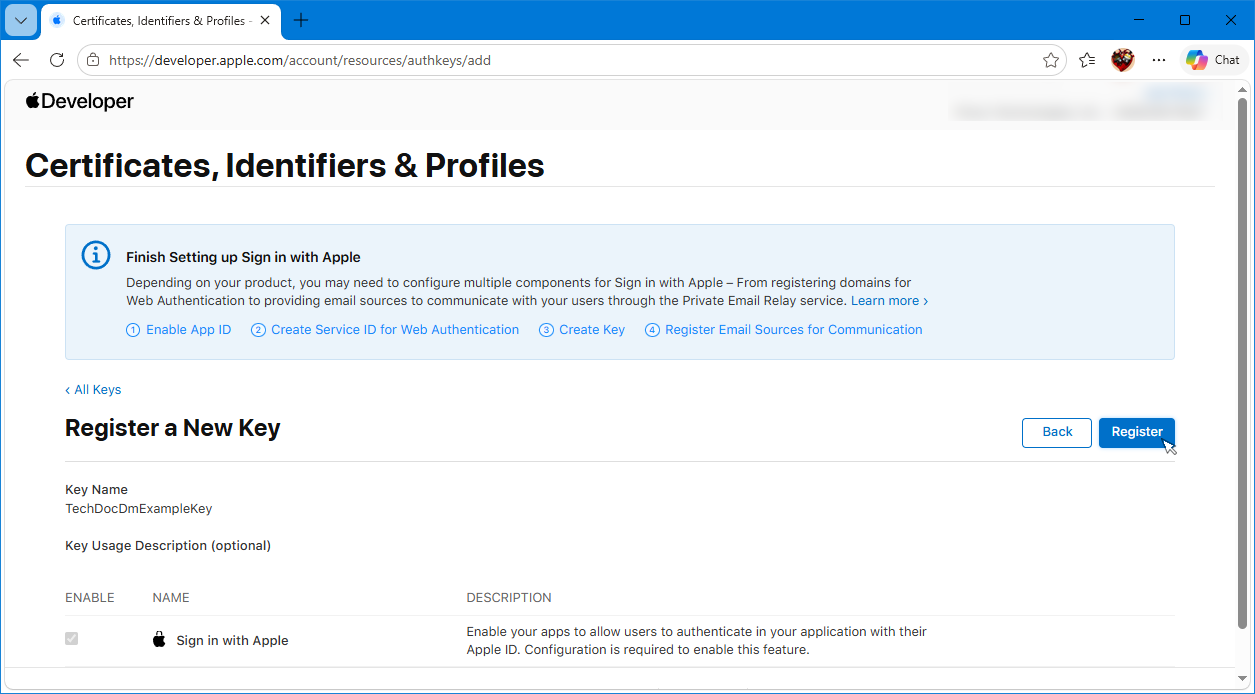
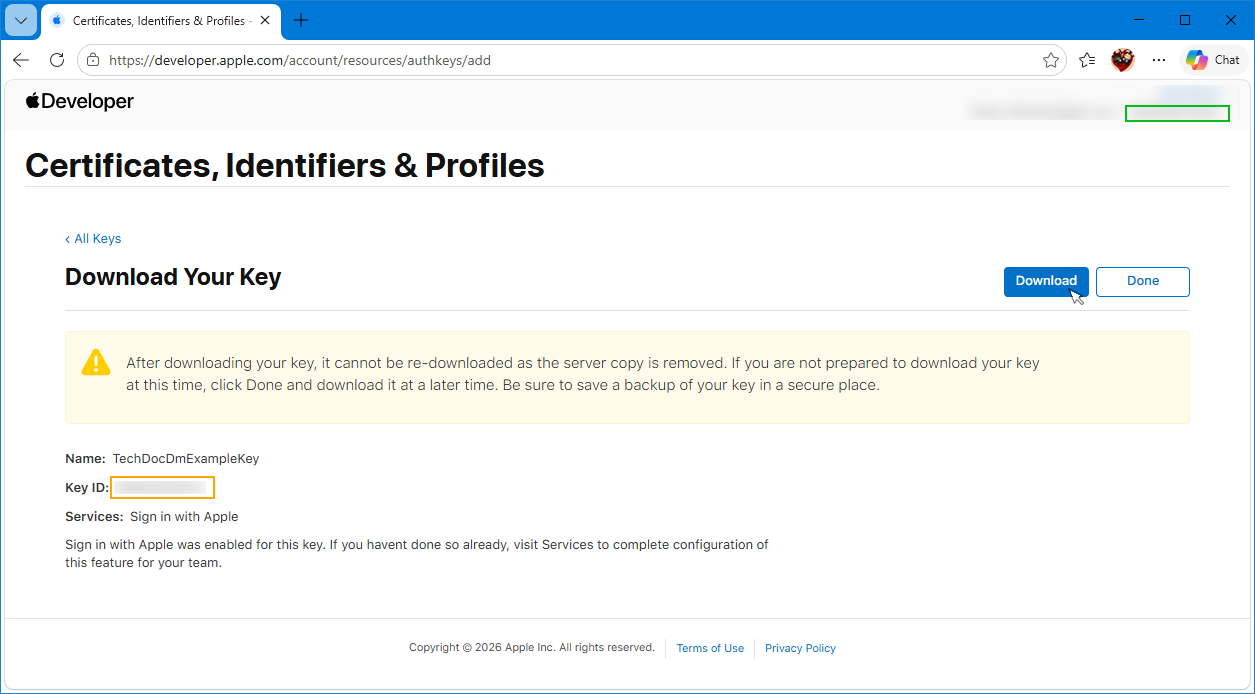
- On the Download Your Key screen, make sure you click the Download button to save your private key file to your TechDoc/etc directory; if you miss this step, you will have to delete the key and re-create it so that you can download the key. In the text file you created earlier, write down and save the Key ID for your key shown in the orange box. While you've got the text file open, go ahead and also note down your Team ID shown in the green box in the upper right corner. For the Team ID, you only want to write down the capital letters and numbers after the dash. The Team ID in this example has been obfuscated for security purposes.
- This completes the Apple side of the configuration, but before we move on to the TechDoc configuration, we need to save a copy of the Apple OIDC IDP metadata. Open a web browser and enter the following address into the address bar:
https://appleid.apple.com/.well-known/openid-configuration
this should result in a screen that looks like this:
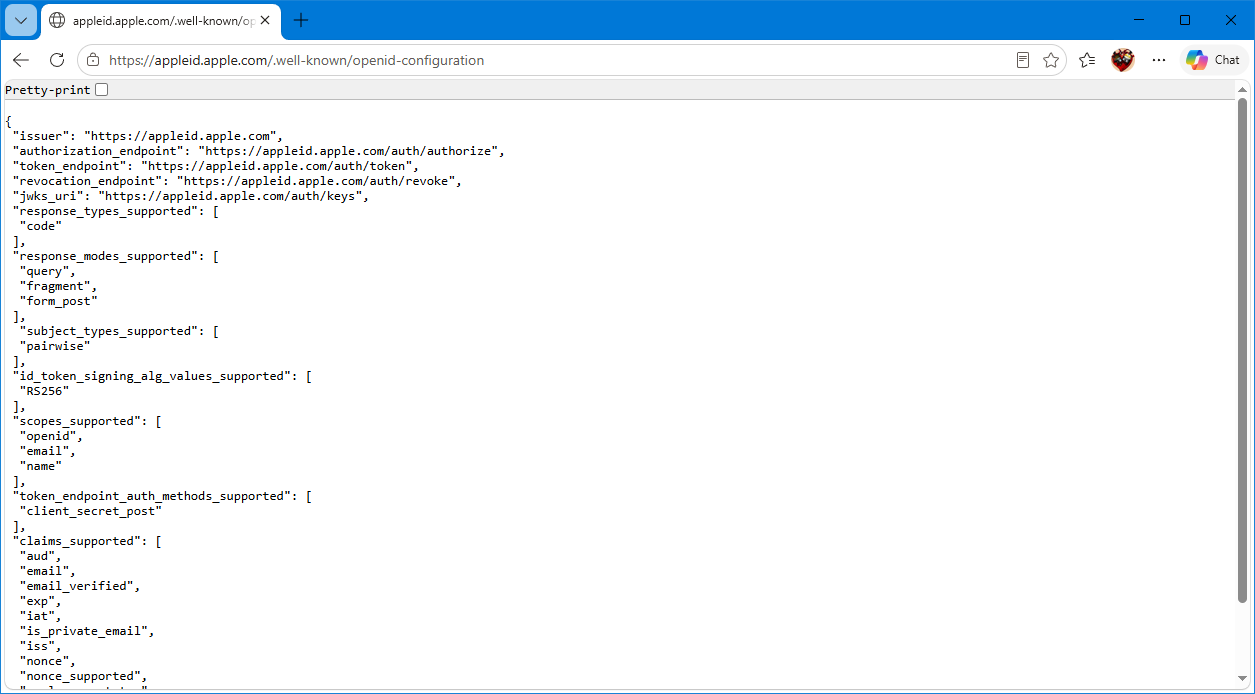
- Right click and select Save as... and save the metadata to a file in your TechDoc/etc folder; we named ours idp-metadata-apple.json.
Setting up an OIDC Authenticator in TechDoc
- Open a web browser and navigate to your TechDoc DM or SM (we'll be using a DM for this example), log in as an Admin, and click on the Admin link on the top menu bar.
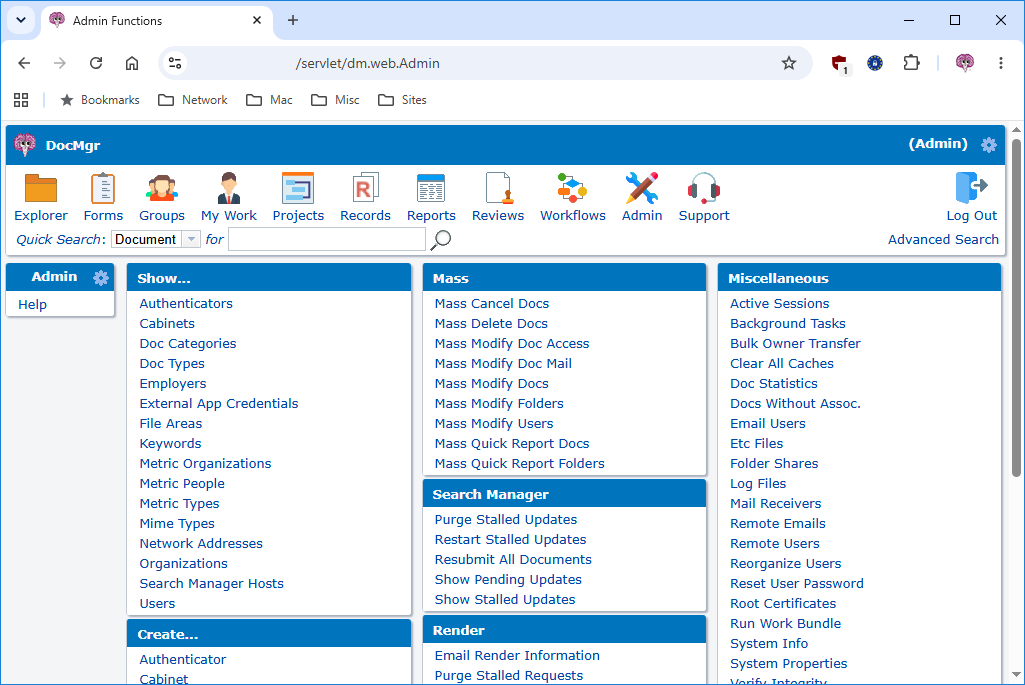
- On the Admin screen, click the Authenticator link under the Create... to start the creation of the TechDoc OIDC authenticator.
- On the Create Authenticator screen, enter a name for the authenticator and select OIDC from the drop down menu.
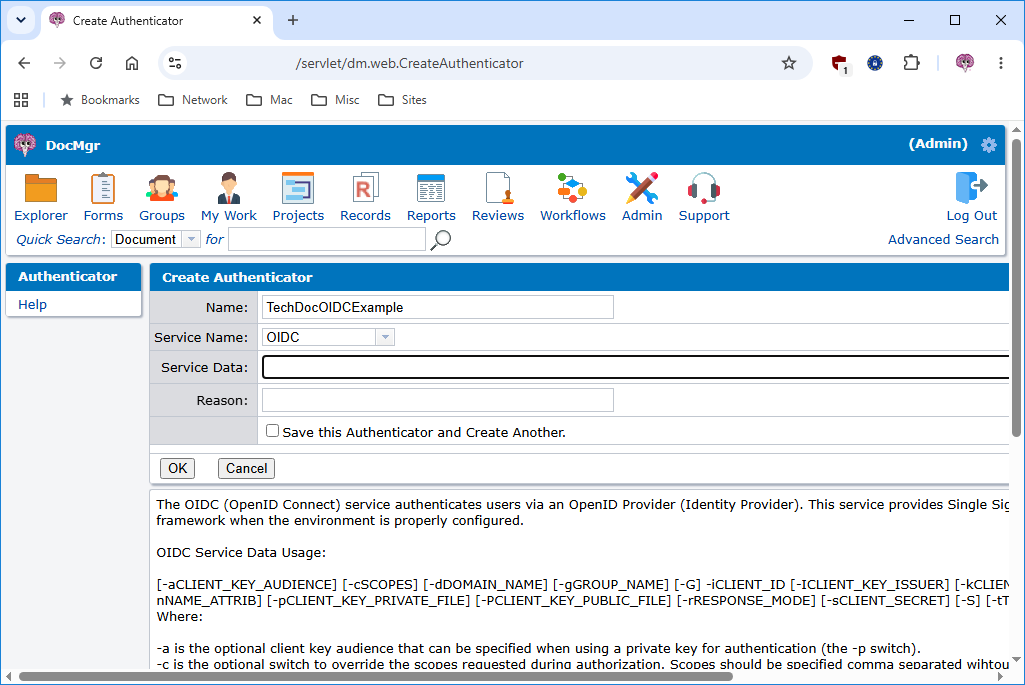
- For the service data, we'll need to specify the following:
-mMETADATA_FILENAME_HERE -iSERVICE_ID_IDENTIFIER_HERE -pPRIVATE_KEY_FILE_NAME_HERE -kKEY_ID_HERE -rform_post -S -ahttps://appleid.apple.com -ITEAM_ID_HERE
where- -m - specifies the name of the Apple metadata file you saved into your TechDoc/etc folder. Replace METADATA_FILENAME_HERE with the name of the metadata file.
- -i - specifies your client identifier; for Apple this should be the Service ID Identifier you noted in your text file. Replace SERVICE_ID_IDENTIFIER_HERE with your Service ID Identifier.
- -p - specifies the name of the private key file you downloaded into your TechDoc/etc folder. Replace PRIVATE_KEY_FILE_NAME_HERE with the name of the private key file.
- -k - specifies the Key ID you noted in your text file. Replace KEY_ID_HERE with your Key ID.
- -r - specifies form_post to instruct the authenticator to use a POST instead of GET for the authorization request; Apple does not follow the norm here.
- -S - instructs the authenticator to specify the the assertion using the client_secret request attribute. Apple does not correctly follow the OIDC specification; client_assertion should be used not client_secret.
- -a - to specify https://appleid.apple.com as the audience for the authentication assertion. Apple does not use the Token Endpoint URL from it's metadata as the OIDC specification dictates it should.
- -I - to override the key issuer in the authentication assertion. Replace TEAM_ID_HERE with your Apple Team ID that you noted in your text file earlier.
- Once you've entered the service data for your authenticator, click the OK button to complete the creation.
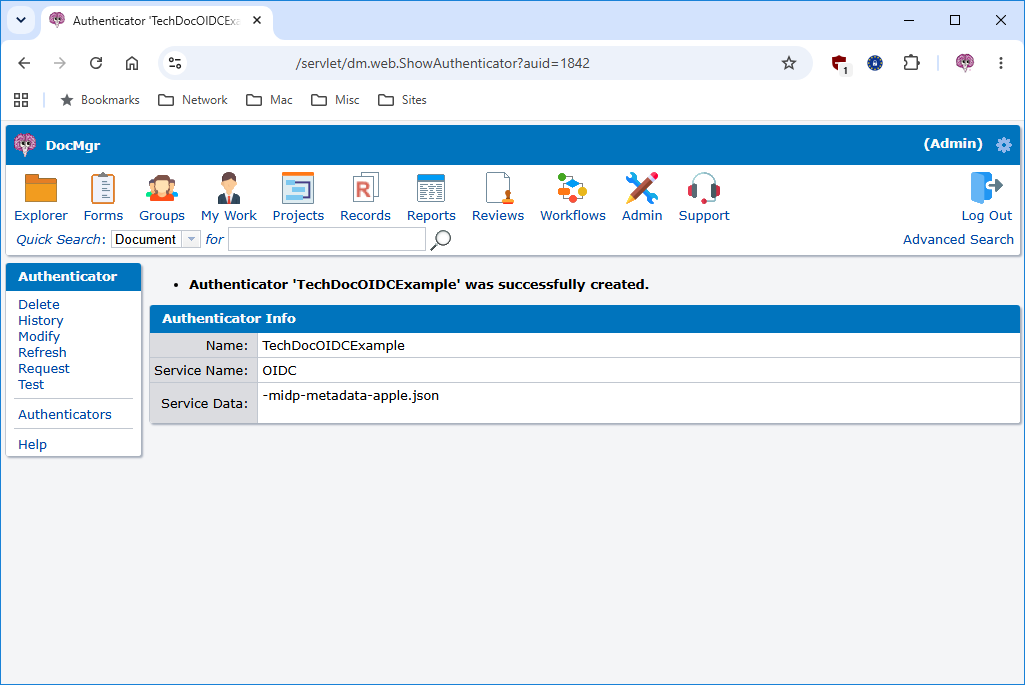
- You may now click the Test link on the side menu, and then click the Test using... button to test your authenticator.
- You should see a list of user attributes returned that resembles the screenshot below. Make sure you see the entry named email. This claim is the default one that will be used to map the Apple user account email address to a TechDoc account. If a different claim is to be used, make sure that claim appears in the list. You may need to add the -n switch to your authenticator to specify the name of the specific claim you wish to use to identify users.
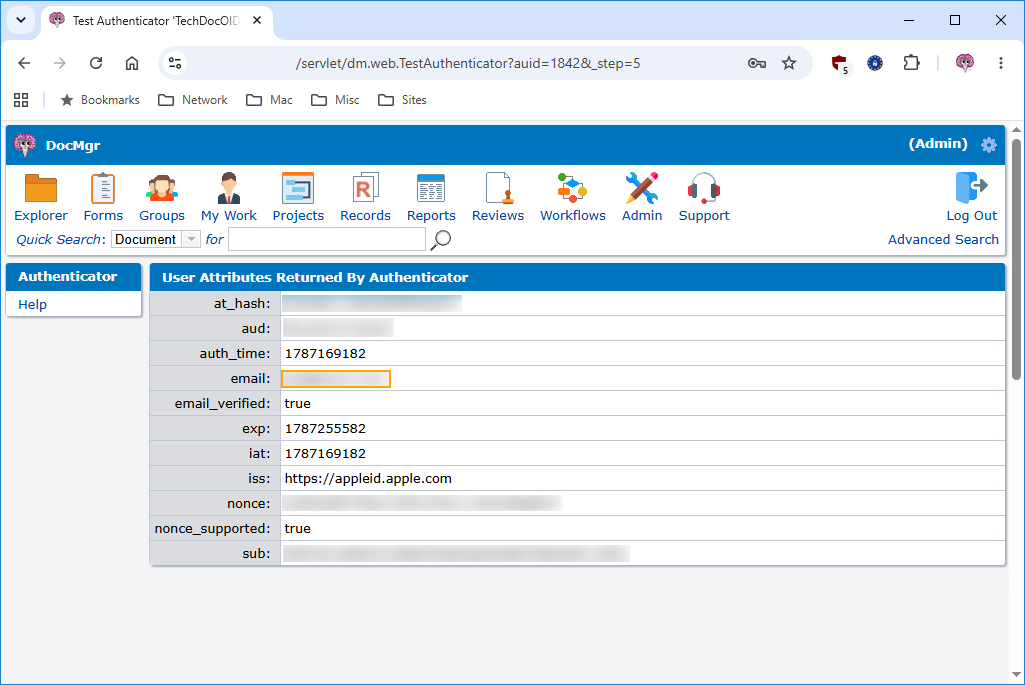
- If everything looks good, your configuration is complete! You are free to begin creating users using this authenticator by selecting it from the list on the create/modify user screen and entering their Apple user account's email address (their email or whatever other unique identifier you've chosen to use) in the field next to the authenticator.
One final note: If your plan is to migrate an existing SAML Authenticator to use OIDC, you can perform the following steps to transition the existing SAML authenticator over to using OIDC and all users assigned to that authenticator will now be using OIDC to access TechDoc.
- Thoroughly try out the test OIDC authenticator that you set up above to make sure you're confident that it is working correctly.
- Record the current SAML authenticator's settings somewhere; particularly the Service Data string.
- Modify the current SAML authenticator, change its Service Name from SAML to OIDC, copy the Service Data string from the test OIDC authenticator that you set up to here, enter a reason, and click OK.
- Now test your newly converted authenticator to make sure it's working properly as an OIDC authenticator.
- If there are any problems, you can always modify the authenticator and change the Service Name back to SAML and change the Service Data string back to what you recorded in step 2.
- Once happy with the SAML to OIDC migration, you can delete the test OIDC authenticator if you no longer want it around.