
As a good security practice, all TechDoc traffic (and for that matter, almost all web application traffic) should be conducted over HTTPS. On Windows, TechDoc runs underneath IIS so almost all IIS features and capabilities can be applied to the TechDoc web application. One fix for HTTPS is to simply set your web site to require HTTPS only. While this will work, it is not very user-friendly to users who attempt to access TechDoc via HTTP. The user will simply receive an error in their web browser.
An alternate, more user-friendly approach is to leave HTTP enabled but redirect all HTTP traffic automatically to HTTPS. There are a couple ways to do this but the easiest and most effective way that we have found to do this is using Microsoft's URL Redirect Module for IIS. It works and has been tested with IIS on Windows Server 2008 R2 and Windows Server 2012 R2.
- If necessary, enable SSL on the IIS web site that TechDoc is hosted on in the normal manner.
- Use a web browser to verify that the web site works on both HTTP and HTTPS.
- Download and install Microsoft's URL Redirect Module from https://www.iis.net/downloads/microsoft/url-rewrite.
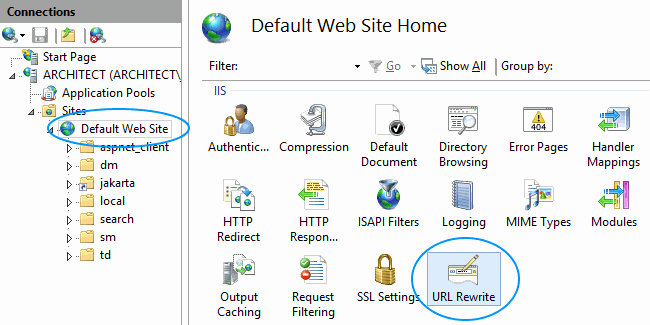
- Open IIS Manager, navigate to and click on the web site where TechDoc is hosted in the left panel to select the web site. Then double click on URL Rewrite in the center panel.
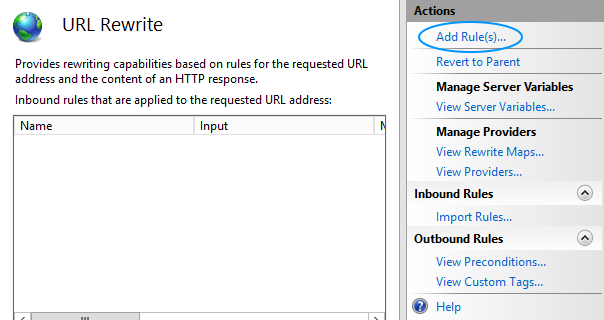
- Once URL Rewrite opens, click Add Rule(s)... on the right side.
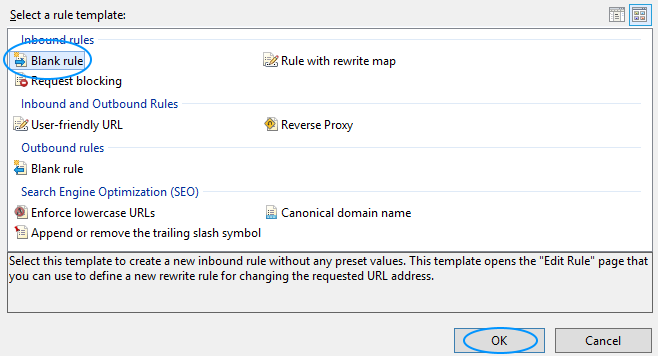
- Once Add Rule(s) opens, select Blank rule under Inbound rules and click OK.
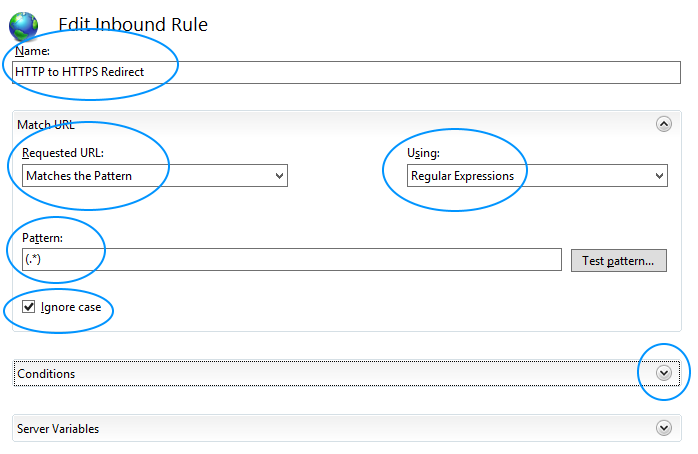
- Once Edit Inbound Rule opens, enter a name for the rule such as
HTTP to HTTPS Redirect. Make sure Requested URL is set toMatches the Patternand Using is set toRegular Expressions. For the pattern, enter(.*)which is open parenthesis, period, asterisk, and close parenthesis. Make sure Ignore case is checked. Then click on the down arrow to expand Conditions.
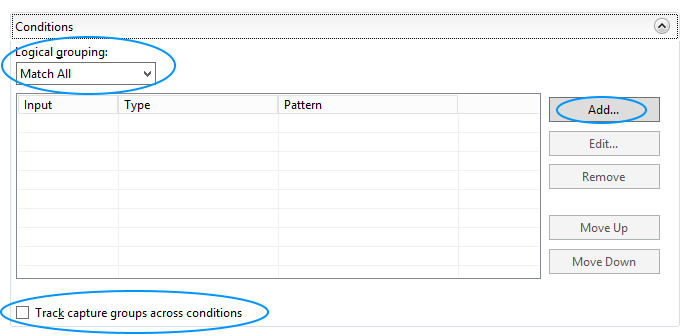
- With Conditions expanded, make sure Logical grouping is set to
Match All, make sure Track capture groups across conditions is unchecked, and then click Add...
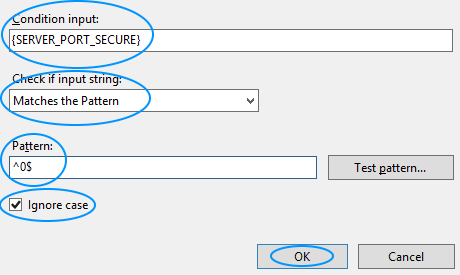
- Once Add Condition opens, enter
{SERVER_PORT_SECURE}for Condition input, make sure Check if input string is set toMatches the Pattern, enter^0$which is circumflex, zero, and dollar sign for Pattern, make sure Ignore case is checked, and click OK.
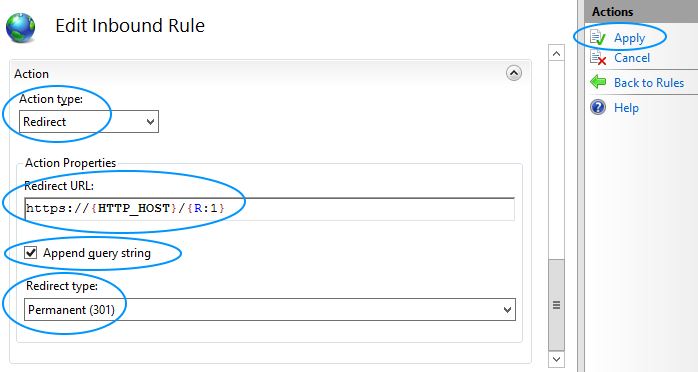
- Back on Edit Inbound Rule under Action, change Action type to
Redirect, enterhttps://{HTTP_HOST}/{R:1}for Redirect URL, make sure Append query string is checked, make sure Redirect type is set toPermanent (301), and then click Apply on the right side.
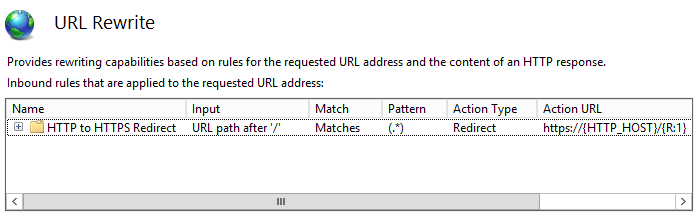
- After the rule has been applied, click on Back to Rules just under the Apply that you clicked in the previous step. If done correctly, your new rule should be displayed under the Inbound rules.
- Now close IIS manager, open a web browser, and test several HTTP URLs to make sure they redirect to the HTTPS version of the URL. If not, retrace the steps in this article to make sure everything was done correctly.