
Since version 7, TechDoc has had the ability to integrate directly with most standalone email clients through the use of the IMAP/IMAPS protocol. There are vast array of email clients out there and most support IMAP these days: Microsoft Outlook, Mozilla ThunderBird, Evolution, etc. Once you've connected your email client to your TechDoc user account, you'll be able to simply drag emails from your inbox directly into folders within TechDoc! Many of our users rely very heavily on this feature; a large number of them use this integration to help them meet records management requirements they're required to follow. After performing the initial connection to TechDoc, one can log into TechDoc, navigate to the Mailboxes cabinet and find the folder for their username. Under this folder will exist all of the folders created by their email client (typically, Inbox, Drafts, Sent Items, Trash, etc). When an email is dragged from their email client to one of these folders, their email client uploads the email to TechDoc where it becomes a TechDoc document. Once the email has become a TechDoc document it can be manipulated just as any other document within TechDoc.
In this tutorial, we'll show you the steps involved to configure both TechDoc and Microsoft Outlook 2013. In order to make the configuration changes on TechDoc, you must have an Administrator account on the document manager (DM). However, once a TechDoc DM has been configured user after user may connect to the DM completely on their own without any additional TechDoc side configuration. If you are not an Admin on your DM, please contact your local help desk to see if your DM has already been configured to support IMAP/IMAPS.
Initial Configuration of the TechDoc Document Manager
We'll first need to configure the TechDoc Document Manager (DM) before any users will be able to connect with their email clients. Follow the steps below to configure your DM:
- Log into your DM with an Administrator account and navigate to the Admin screen by clicking the Admin link on the top menu bar.
- Now click System Properties under the Miscellaneous section.
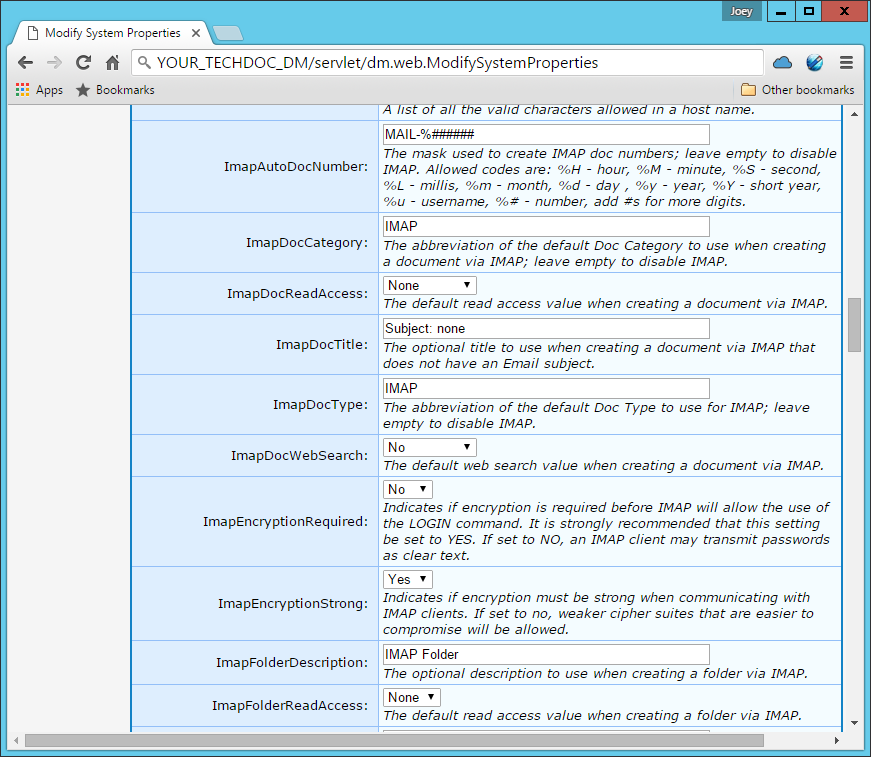
- Scroll down to the Imap properties so that we may configure each of them:
- ImapAutoDocNumber - This field is used to automatically generate a document ID for the document created when a user drags an email into a TechDoc folder in their email client. This field works just like any other auto number mask in TechDoc. In the example above you'll see:
MAIL-%######
This auto number field says to number all of the emails with the prefix MAIL- and then a six digit number, i.e. MAIL-000001, MAIL-000002, and so on. Obviously this works just fine for very small setups however, in the real world, a system may easily have 10,000 users and you would quickly run out of numbers. Once MAIL-999999 was reached there would be no more numbers left to assign new documents. For this reason, we encourage the use of a more flexible numbering scheme such as:
MAIL-%y-%m-%d-%u-%######
An auto numbering mask such as this would produce document number like MAIL-2015-12-01-USER-000001 where USER is the username of the user. A numbering sequence like this offers several benefits. First and for most, all of the document numbers will be unique to each user additionally, every day the numeric count %###### will restart to 000000. In a setup like this, you'll end up with a quite inexhaustible set of document numbers... Most users should not be storing 1,000,000 emails per day. With all of this in mind, you're free to use this example or create one on your own that will better suit your needs. - ImapDocCategory - You'll want to enter the abbreviation of the document category to place on all of these email document being created. In most instances, customers usually like to create a separate document category such as EMAIL or IMAP to use exclusively for storing email documents. If you do not have a special document category created yet, you can right click the Admin link at the top of the page, open a new tab, and create that document category now. Once you've selected/created the document category, enter the abbreviation of the document category to use in this text box.
- ImapDocReadAccess - Select from the dropdown, the default read access you want to assign to the email documents created. This setting is very dependent on the type of experience you want and the security you need for your environment. If you are unsure of want to use, select None to begin with. You may change this setting to Local read to allow other local users read access to the emails as well. When set to None, only the original user that uploaded the email and Administrators may view the email.
- ImapDocTitle - By default, TechDoc will use the subject of the original email as the title for the document it creates when storing the email. However, there are situations where an email may not have a subject and in situations like these, this field will be specified instead as the title for the document. You'll want to specify something like:
Subject: none
to indicate there wasn't a subject for the email. Additionally, this field may be left blank so that the title of the document is left blank if the email does not have a subject. - ImapDocType - Again, just like ImapDocCategory, most systems are configured to use a special document type that is dedicated solely for the use of storing email. If you have a currently existing document type you'd like to use, enter the abbreviation for it now. However, we do suggest you create a dedicated document type such as EMAIL, IMAP, etc. so that all email will have it's own document type for simplicity sake later on. If you need to create a document type, open a new tab and create the doc type. Then enter the abbreviation of that newly created doc type in this text box.
- ImapDocWebSearch - Similar to ImapDocReadAccess you'll want to select the default web search value to place on the document created for each email. If you do not want/require the emails to be searchable on a Search Manager, you should select No for this item. Again, this item could have potential security implications if configured incorrectly, so only select a web search setting if the emails should be searchable in an SM.
- ImapEncryptionStrong - This setting is used to disallow weak IMAPS security cipher suites. Just like many protocols, IMAP has been around for a long time and several of the original cipher suites are easily defeat-able these days. It is encouraged to select Yes for this option to block the usage of these weak cipher suites. However, we do realize some environments are running older email clients that may only support older cipher suites and in cases like these you'll need to select No to allow any of the cipher suites. Consult your IT department for more information on this if you are unsure what is the best decision for your environment.
- ImapFolderDescription - This field can be set to add a description to each folder created under the user's mailbox folder in TechDoc. We usually suggest specifying something like Mail Folder, IMAP Folder, etc. You may leave this field blank if no description is needed.
- ImapFolderReadAccess - This field indicates the read access that should be given to each of the folders created under a user's TechDoc Mailbox folder. We suggest specifying None if you are unsure, as None will allow only the user and an Administrator to view an email folder under their TechDoc Mailbox folder. If other user's should be able to at list few the emails in the folder, you may then consider one of the other read access settings.
- Once you have configured all of the above properties, scroll down to the bottom of the System Properties page, enter a reason, and then click OK.
- You'll now want to check and make sure the IMAP and/or IMAPS background service(s) are running so that the users' email clients will be able to connect to the DM.
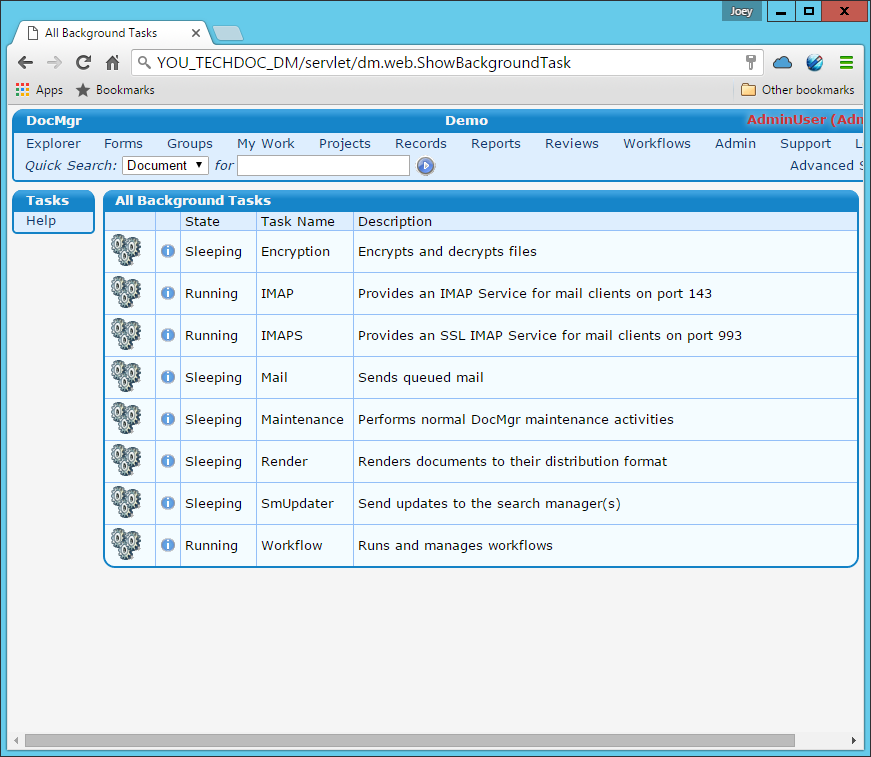
- Click Admin on the top menu bar and then click Background Tasks under Miscellaneous. Look to see that the IMAP and/or IMAPS services are running. We strongly suggest that you only enable the IMAPS service and allow your DM to only accept secured connections. However, if you need clear text IMAP connections you may also enable the IMAP service. To enable a service, click the icon next to the service and then click the Enable link on the following screen.
After completing the above, your TechDoc DM should be ready to accept IMAP/IMAPS connections from email clients. If you run into any connectivity issues, please check to make sure that your Windows/hardware firewall is not blocking the ports 143 (for IMAP connections) and/or 993 (for IMAPS connections). Refer to the next section for the steps to follow to connect Outlook 2013 to a TechDoc user account.
Connecting Outlook 2013 to a TechDoc Document Manager User Account
In this section we'll go through the steps needed to configure Outlook 2013 to connect to a TechDoc Document Manager (DM) user account. Your TechDoc DM must already be configured to allow email connections (IMAP/IMAPS). If you are unsure, please contact your local help desk to confirm your DM is configured to allow email clients to connect.
- Move to the workstation where you want to configure Outlook.

- Open Outlook 2013 on the client's PC.
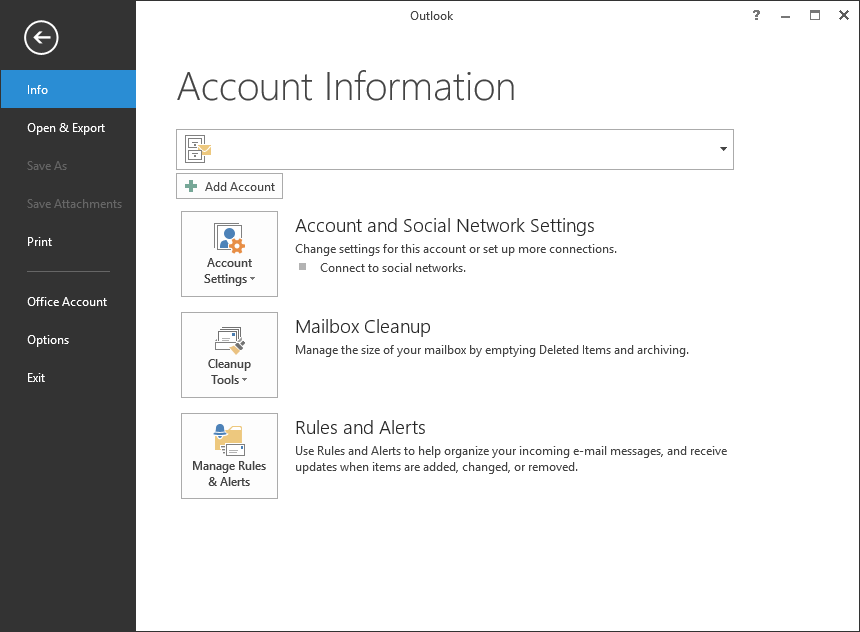
- Click FILE on the top menu.

- Click the Add Account button on the right pane. Select the "Manual setup or additional server types" radio button and then click the Next button.
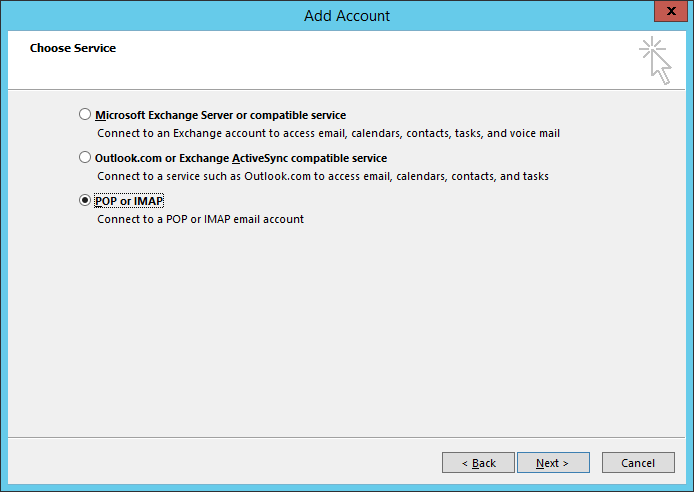
- Click the "POP or IMAP" radio button and then click the Next button.
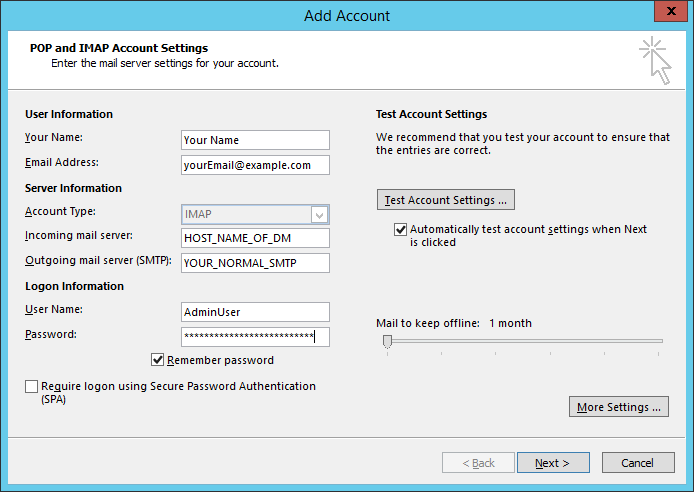
- On the Add Account screen, enter the following:
- Your Name - Enter your full name.
- Email Address - Enter your email address that you use most frequently.
- Incoming mail server - Enter the host name of the DM you want to connect to. If you are unsure of the host, open your web browser and log into TechDoc. If you look at the address bar at the top, you should see something like https://YOUR_DM_HOST_NAME/servlet/dm.web.Explore. You'll want to use the YOUR_DM_HOST_NAME portion of the URL for the Incoming mail server field.
- Outgoing mail server - For this field, you'll just want to enter the SMTP (outgoing mail server) that you use for your other email accounts. The Outgoing mail server should not point to your TechDoc DM.
- User Name - Enter your TechDoc user name.
- Password - Enter your TechDoc password.
- If you have questions about what to enter for any of these fields, please contact your local help desk.
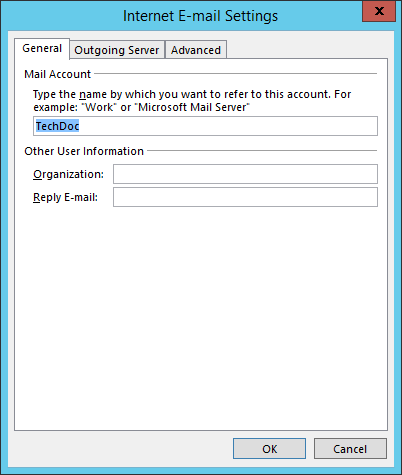
- Click the More Settings button. On the General Tab, enter a display name for this email account. This is the name that will be displayed for this email account within Outlook.

- Click the Outgoing Server tab and enter the authentication information for your SMTP server. Not all SMTP servers require authentication to send mail. If your SMTP server doesn't require authentication, just leave the top checkbox unchecked. Otherwise, if you need to authenticate to send mail, check the top checkbox and complete the remainder of this tab.
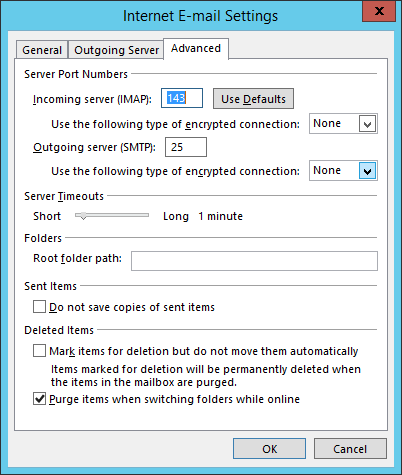
- Click the Advanced tab. If your are using IMAPS, you'll want to enter 993 for the Incoming server (IMAP): field. If you are using clear text IMAP, you'll want to enter 143. Enter the port number you use for your SMTP server. Once you have completed this tab, click the OK button.
- Back on the Add Account screen, click the Next button to continue on and perform the connection test.
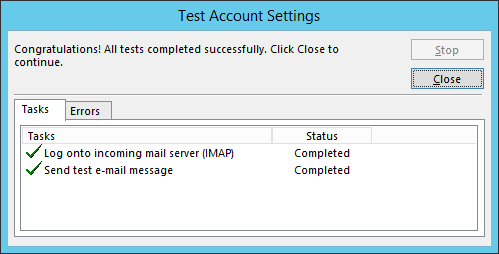
- If the connection test was a success, your screen should look like this. If the connection didn't succeed, you'll need to verify all of the connection information you entered. If you have questions about what to enter for any of the connection fields, please contact your local help desk.
Outlook 2013 / TechDoc Document Manager Integration Demo
Once you've configured your TechDoc DM and Outlook to connect to your TechDoc user account, you may begin uploading emails to TechDoc. Open Outlook 2013 and we'll go over moving emails in and out of your TechDoc email folders.
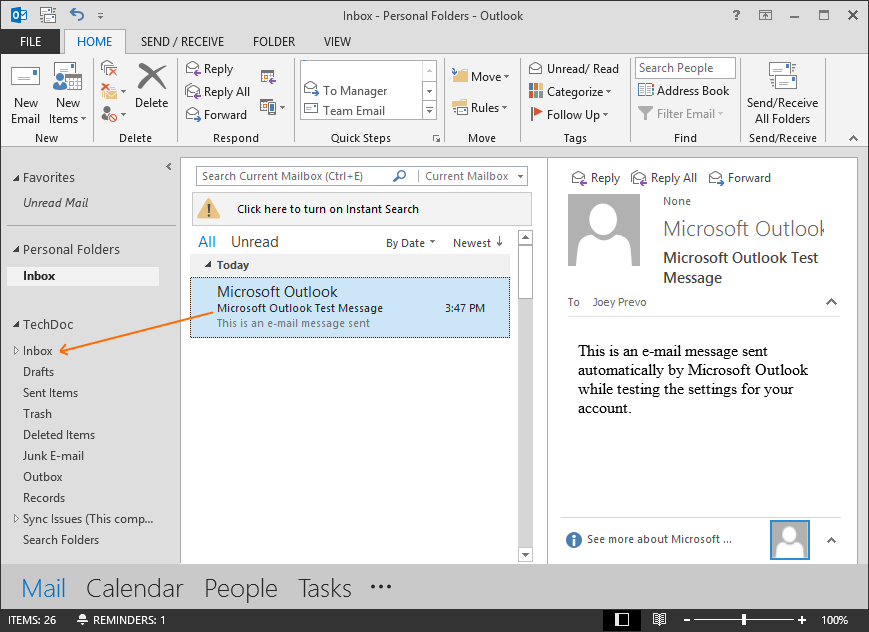
In this example, we'll select an email from the Inbox of our company email address and drag it into the Inbox folder under our TechDoc user account.
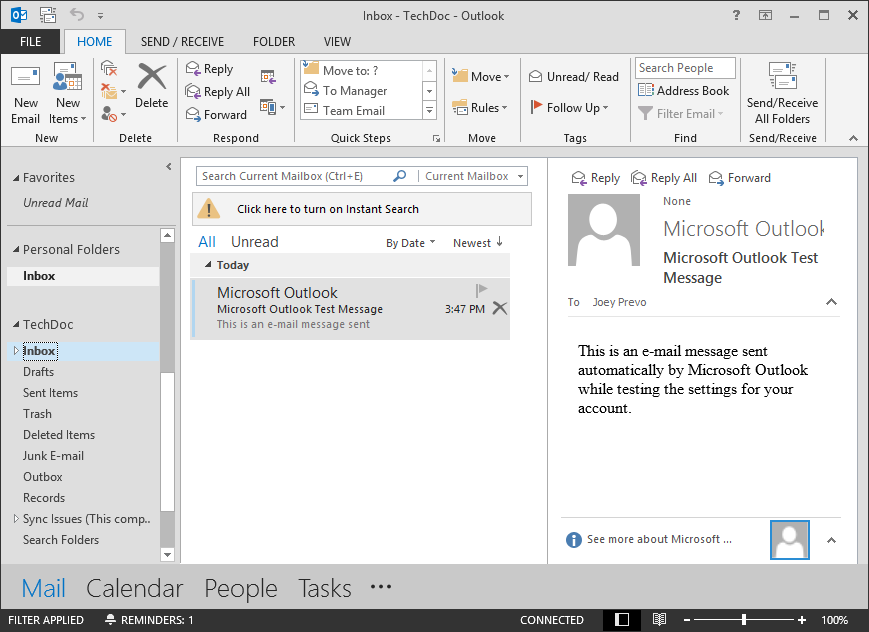
You'll see after dragging the email, it no longer appears under the Inbox folder on my main email account. Now, if you click on the Inbox folder listed under our "TechDoc" account in Outlook, you'll see that the email is now listed here. In actuality, the email now resides as a document in TechDoc. Additionally, I'm free to drag this email back to any of my normal email folders and it will become a normal email just as any other in Outlook. You may right click on the TechDoc email folder or any of its subfolders, create new folders for organizational purposes and store your emails any way you please in TechDoc.
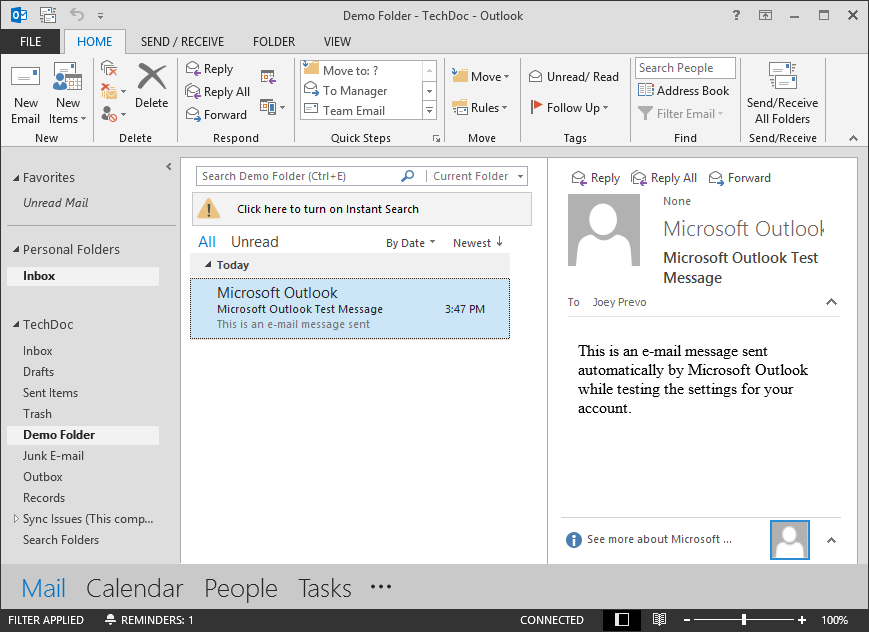
In the example above, I created a new folder called "Demo Folder" and drug that same email from my TechDoc\Inbox folder to this new folder. Let's log onto the DM and see what this all looks like.
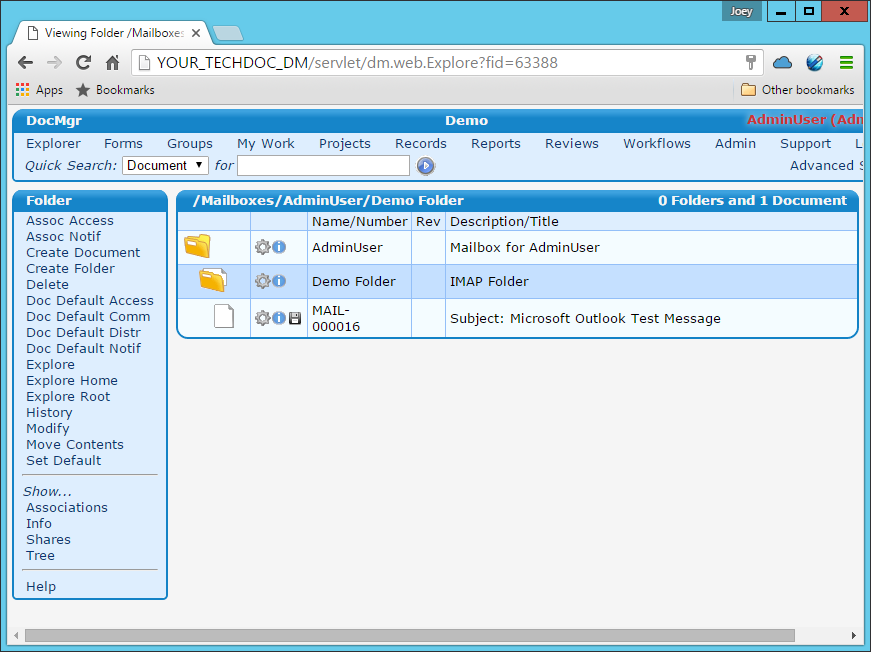
Looking at my DM, if I click Explorer and navigate to my mail folder, I can see the new folder I just created called Demo Folder. If I click on this folder, I see that it contains one document.
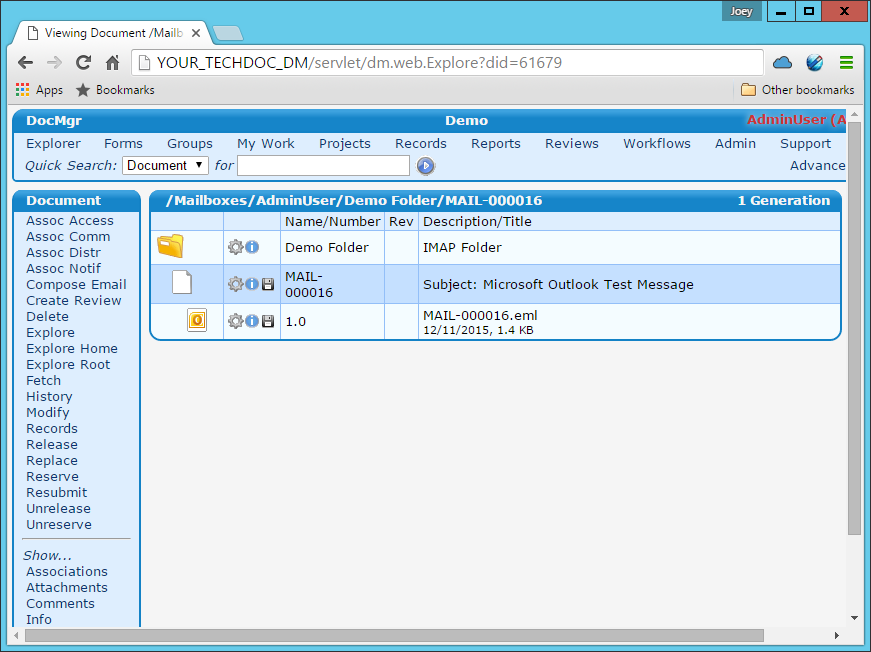
If I click the document, I can see that my email was stored as a generation under the document.
This type of integration can be established not just with Outlook 2013, but nearly all other IMAP email clients out there. Managing emails in your favorite Document Management system has never been easier!